
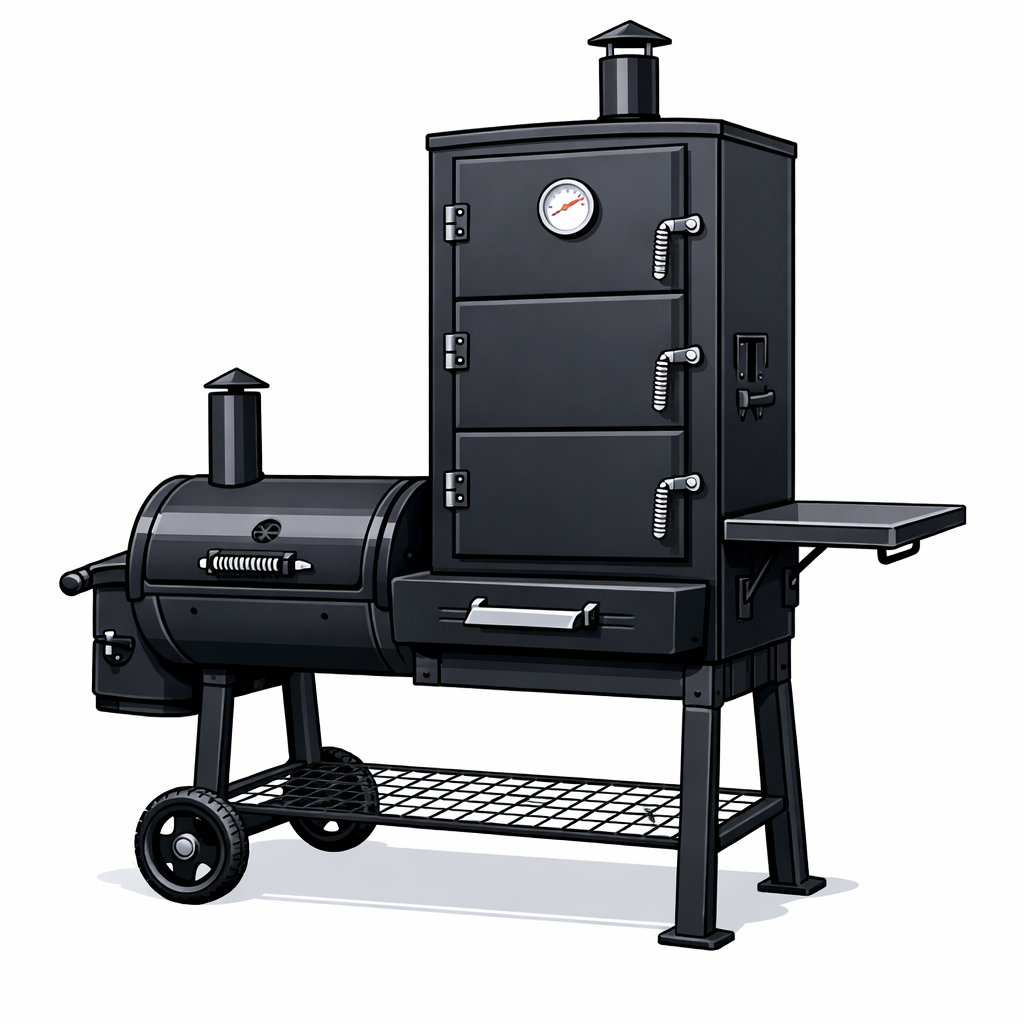
Sophia & William Heavy-Duty Vertical Offset Charcoal Smoker – Complete Mastery Guide
Best for: Backyard grill buyers
A solid option worth comparing before you buy.
Check Price on AmazonAs an Amazon Associate I earn from qualifying purchases.
Updated: August 6, 2026
Quick Answer The Sophia & William Heavy-Duty Vertical Offset Charcoal Smoker delivers 961 square inches of total cooking space (855 sq. in. primary chrome-plated five-layer zone + 106 sq. in. offset) in a vertical design that produces even heat and pure smoke with no hot/cold sides. Heavy-duty steel construction, adjustable grates and hanging racks, push-out ash tray, built-in temperature gauge, and side dampers make it suitable for large gatherings while remaining practical for long low-and-slow cooks.
Key Specs and Design Advantages
- Cooking area: 961 sq. in. total (5 removable/adjustable chrome-plated primary grates + offset chamber).
- Dimensions / weight: Approximately 27″ D × 43.8″ W × 51.5″ H; 101 lb.
- Construction: Heavy-duty steel with improved door seals/latches and side water-filling door to minimize heat and smoke loss.
- Features: Hanging racks for ribs/sausages/poultry, push-out ash tray + grease cup, warming tray on the side firebox, dual side dampers, large wheels for mobility, and built-in temperature gauge.
The offset firebox keeps food away from direct flame so cooking occurs primarily via circulating heat and smoke. The vertical orientation promotes natural upward heat flow, reducing the need to rotate food and delivering more consistent results across all racks compared with many horizontal offsets.
Setup and First Use
Assembly is typically picture-based and takes roughly 90 minutes for the vertical model. Keep all bolts loose until the structure is fully aligned, attach the bottom shelf to the legs early, and verify door latches for a tight seal. Perform a dry burn (no food) on the first use to burn off manufacturing residues and season the interior.
Temperature Control and Operation Mastery
Control heat primarily with the firebox dampers (intake) and exhaust. Aim for the classic 225–275 °F range for most low-and-slow work. The built-in gauge is useful for monitoring trends; many users pair it with a dual-probe digital thermometer for grate-level accuracy. Add charcoal or wood chunks through the side access as needed without fully opening the main chamber. A water pan (via the side filling door) helps stabilize temperature and adds moisture.
Thin blue smoke is the goal; thick white smoke can impart bitterness. Use a chimney starter for clean lighting and avoid lighter fluid once the fire is established.
Cooking Capacity and Techniques
The five adjustable racks plus hanging space easily handle multiple racks of ribs, several whole chickens or pork butts, a large brisket, and sides simultaneously—ideal for events. Hang larger cuts on the racks for efficient use of vertical space. The offset chamber can run smaller items or hold extra fuel while the main chamber focuses on the primary cook.
Cleaning and Maintenance
Empty the push-out ash tray and grease cup after every cook once fully cool. Brush grates while warm. Wipe exterior surfaces and inspect seals periodically. A fitted cover protects against weather; touch up any coating chips with high-heat paint as needed. Regular cleaning prevents buildup that affects airflow and flavor.
Safety Essentials
Operate only outdoors on a hard, level, non-combustible surface with at least 10 feet of clearance from buildings, vegetation, or other combustibles. Never leave the smoker unattended while lit. Keep children and pets away. Use heat-resistant gloves and long-handled tools. Allow the unit and ashes to cool completely before emptying or moving. Follow standard charcoal safety practices: no gasoline or other accelerants, and extinguish by closing dampers rather than water.
These practices align with general manufacturer guidance for outdoor charcoal smokers and authoritative outdoor cooking safety resources.
Table of Contents
1. Why the Sophia & William Heavy-Duty Vertical Offset Charcoal Smoker Is an Excellent Grill
Looking for a charcoal smoker that delivers real barbecue flavor without constant babysitting? The Sophia & William Heavy-Duty Vertical Offset Charcoal Smoker stands out as a practical, high-capacity choice that works well for beginners in their late teens or twenties all the way to experienced grillers in their 60s and 70s.
With a total of 961 square inches of cooking space, heavy-duty steel construction, and a smart vertical + offset design, it solves the common problems of uneven heat, limited capacity, and messy cleanup that frustrate many backyard cooks.
Massive Cooking Capacity for Any Gathering
This vertical smoker gives you:
- 855 sq. in. of chrome-plated primary cooking area across five adjustable layers
- 106 sq. in. offset smoker chamber
That means you can easily handle a full packer brisket, multiple racks of ribs, whole chickens, sausages, and sides at the same time. Removable cooking grates let you change the height and number of levels depending on what you’re cooking. Whether you’re feeding a small family dinner or hosting a big backyard party for 10–15 people, you won’t run out of space. Hanging racks add even more flexibility for ribs, sausages, or poultry, making efficient use of the vertical interior.
Even Heat and Authentic Smoke Flavor
The combination of vertical design + offset firebox is one of the strongest reasons this is a good grill:
- Being offset means no direct flame under the food — you cook with pure heat and smoke.
- Being vertical lets heat rise naturally and distribute more evenly from top to bottom.
- Food doesn’t develop a hot side and cold side, so you rarely need to rotate or flip large cuts.
Heavy-duty steel construction holds temperature steadily. Adjustable latches keep the door tightly sealed to minimize heat and smoke loss. A side water-filling door lets you add moisture without opening the main chamber and dropping the temperature. The result is consistent low-and-slow smoking that produces deep smoke flavor and a proper smoke ring.
Built Tough and Easy to Live With
At 101 lbs with thickened legs and large wheels, this smoker feels solid and stays put even in windy conditions. Key convenience features include:
- Push-out ash tray for quick cleanup
- Grease cup to catch drips
- Built-in temperature gauge
- Adjustable dampers for airflow control
- Side access for adding charcoal or water without major heat loss
Dimensions are approximately 27″ D × 43.8″ W × 51.5″ H — substantial but manageable for most patios and decks.
Who It’s Perfect For (Ages 18–70)
- Younger users (18–35): Large capacity for parties and friends, modern vertical design that looks good, and straightforward temperature control once you learn the basics.
- Families and mid-life cooks (35–55): Enough space to cook for the whole family plus guests in one session. Reliable performance for weekly weekend BBQ.
- Experienced or older grillers (55–70): Even heat reduces the need for constant monitoring. Heavy-duty build and easy ash removal make long smoking sessions more comfortable.
Potential Drawbacks to Consider
Like most charcoal smokers, it requires some practice with fire management and airflow. Assembly takes time (typical for this size of unit). It’s not a set-it-and-forget-it pellet grill — you need to manage the charcoal. Proper seasoning and maintenance help longevity.
Final Verdict
The Sophia & William Heavy-Duty Vertical Offset Charcoal Smoker earns its place as a good grill because it combines serious capacity, more even heat distribution than many horizontal offsets, solid construction, and practical features that make smoking accessible and enjoyable across a wide age range.
2. Master Charcoal Fire Management Techniques
Master charcoal fire management is the single most important skill for consistent results on any charcoal grill or smoker, including the Sophia & William Heavy-Duty Vertical Offset model.
1. Choose the Right Charcoal
| Type | Best For | Pros | Cons | Recommendation |
|---|---|---|---|---|
| Lump charcoal | High heat, clean flavor | Lights fast, burns hot, less ash | Burns unevenly, size varies | Preferred for most smoking |
| Briquettes | Steady, long burns | Consistent size & burn rate | More ash, additives possible | Good for long cooks |
| Mix of both | Balance | Best of both worlds | Requires practice | Excellent everyday choice |
Avoid cheap briquettes with a lot of fillers. Good lump or quality briquettes make temperature control much easier.
2. Lighting the Fire the Right Way
Best methods (ranked):
- Chimney starter (most reliable) — Fill chimney ¾ full, place crumpled newspaper or a fire starter under it, light, and wait 15–20 minutes until coals are fully ashed over (gray on the outside).
- Electric starter or propane torch (clean and fast).
- Natural fire starters (wood wool, paraffin cubes) — never use lighter fluid if you care about flavor.
Never cook over flames. Wait until the charcoal is fully lit and covered in light gray ash.
3. Building the Fire for Different Styles
For low-and-slow smoking (225–275°F) – ideal for offset/vertical smokers:
- Use the Minion Method (highly recommended): Fill the firebox or charcoal basket with unlit charcoal. Dig a small well in the center or on one side and place 10–20 fully lit coals there. The fire slowly spreads outward, giving you 6–12+ hours of steady heat with minimal refueling.
- Place a water pan in the main chamber (or use the side water door on the Sophia & William) to stabilize temperature and add humidity.
For higher heat grilling (350–450°F+):
- Full chimney of lit coals spread evenly, or create two-zone cooking (hot side + cool side).
For the vertical offset design specifically:
- Keep the fire in the side offset chamber.
- Heat and smoke rise and circulate more evenly through the vertical chamber, reducing hot/cold spots.
4. Temperature Control = Airflow Control
FAQ
How long does assembly take and is it difficult?
Expect about 90 minutes for the vertical 961 sq. in. model. Instructions are primarily pictorial. Work methodically with bolts left loose until everything is aligned; attaching the bottom shelf early helps. Most users complete it solo with basic tools included or standard household tools.
How do I maintain steady temperatures for long cooks?
Use the side dampers and exhaust to fine-tune airflow. Start with a solid bed of ashed-over charcoal in the offset firebox, add fuel sparingly through the side door, and consider a water pan. A secondary digital probe at grate level is recommended because lid gauges can read higher than the actual cooking zone. Practice on a dry run to learn the unit’s response.
What is the real-world capacity and best uses?
The five adjustable racks plus hanging space and offset chamber comfortably support large gatherings (multiple racks of ribs, several whole birds or butts, brisket, and sides at once). It excels at low-and-slow smoking where even vertical heat distribution shines. Adjustable grate heights let you customize for tall items or maximize layers for smaller pieces.
What cleaning and storage steps keep it performing well?
After cooling, empty the push-out ash tray and grease cup, brush the grates, and wipe surfaces. Cover when not in use to limit weather exposure. Periodic inspection of seals, dampers, and wheels, plus high-heat paint touch-ups on any chips, extends service life.
These answers are drawn directly from the product’s design features and typical user experience with this vertical offset model. Always consult the specific documentation shipped with your unit for model-exact details.Temperature is controlled almost entirely by oxygen.
- Intake damper (bottom or side of firebox) → controls how much air reaches the fire (primary control).
- Exhaust damper / chimney cap → controls how much smoke and heat leave the cooker (secondary control).
Basic rules:
- Open intake more → hotter.
- Close intake more → cooler.
- Exhaust should stay mostly open (about ¾ open is common) to keep clean smoke flowing. Closing it too much creates dirty, bitter smoke.
- Make small adjustments (¼ turn at a time) and wait 10–15 minutes for the temperature to respond.
Target Temperatures for Common Cooks
- Brisket / pork butt / ribs → 225–250°F
- Chicken / turkey → 275–325°F
- Searing steaks → 450°F+
5. Maintaining the Fire During Long Cooks
- Check every 45–90 minutes once the fire is stable.
- Add unlit charcoal or a few lit coals through the side access door when the temperature starts to drop slowly.
- Avoid dumping large amounts of cold charcoal at once — this can drop the temperature sharply.
- Keep the ash tray relatively clean; too much ash restricts airflow.
- Use a reliable digital thermometer with probes in both the grate level and the meat (the built-in lid thermometer is only a rough guide).
6. Clean Smoke vs Dirty Smoke
- Thin blue smoke = good (almost invisible).
- Thick white or gray smoke = incomplete combustion (usually from too little air or wet wood). Open the intake more and wait.
Add wood chunks (not chips) for smoke flavor once the fire is established. Soak only if you want milder smoke; most pitmasters prefer dry chunks.
7. Common Problems & Quick Fixes
| Problem | Likely Cause | Fix |
|---|---|---|
| Temperature climbing too high | Too much air | Close intake damper slightly |
| Temperature dropping | Not enough air or fuel | Open intake, add a few lit coals |
| Thick white smoke | Restricted airflow or wet wood | Open vents, wait for clean burn |
| Fire goes out | Ash buildup or closed vents | Clear ash, open vents, relight if needed |
| Hot spots | Uneven coal bed | Spread coals more evenly or use water pan |
8. Pro Habits That Separate Good from Great
- Preheat the smoker fully (30–45 minutes) before adding food.
- Keep a small “emergency” chimney of lit coals ready for long cooks.
- Learn your specific smoker’s personality — every unit has slight differences.
- Record your cooks (weather, charcoal amount, damper positions, results). Patterns appear quickly.
- Practice the Minion Method on a shorter cook first before committing to a 12-hour brisket.
3. Master Airflow Dynamics
Mastering airflow dynamics is the core skill that turns charcoal fire management from guesswork into precise control. On a vertical offset smoker like the Sophia & William, understanding how air moves through the system determines temperature stability, smoke quality, and even cooking.
How Airflow Actually Works in a Charcoal Smoker
Air follows a simple path:
- Intake (bottom or side damper on the firebox) — fresh oxygen enters and feeds the fire.
- Firebox — oxygen mixes with burning charcoal, creating heat and smoke.
- Main cooking chamber — heat and smoke flow into the vertical chamber.
- Exhaust (chimney or top damper) — spent air, heat, and smoke exit.
In a vertical offset design the path is especially efficient: heat and smoke enter from the side offset firebox, rise naturally through the stacked cooking levels, and create more even temperatures top-to-bottom compared with many horizontal offsets.
The Two Critical Controls
| Control | Primary Effect | How to Use It | Typical Position for Low-and-Slow (225–275°F) |
|---|---|---|---|
| Intake damper | Controls oxygen to the fire (main temp control) | Open more → hotter; close more → cooler | ¼ to ½ open once stable |
| Exhaust / chimney | Controls draft and smoke exit | Mostly open for clean flow; closing too much creates dirty smoke | ¾ open to fully open |
Key principle: Make small changes (⅛ to ¼ turn) and wait 10–15 minutes for the temperature to respond. Large, rapid adjustments create swings.
Draft: The Invisible Force
Draft is the natural pull created by hot air rising and exiting the chimney. Stronger draft = more air pulled through the fire = higher temperature. Factors that increase draft:
- Higher exhaust temperature
- Taller or more open chimney
- Wind (can help or hurt depending on direction)
Factors that decrease draft:
- Closed exhaust
- Cold weather (harder to establish good draft at the start)
- Ash buildup restricting the intake
Clean Smoke vs Dirty Smoke
| Smoke Appearance | Cause | What It Means | Fix |
|---|---|---|---|
| Thin blue (almost invisible) | Good airflow + clean combustion | Ideal — clean flavor | Maintain current settings |
| Thick white / gray | Restricted airflow or incomplete burn | Bitter, sooty flavor | Open intake more; ensure charcoal is fully lit |
| Billowing black | Too much fuel or very restricted air | Harsh, acrid | Open vents significantly; wait for clean burn |
Practical Airflow Techniques for the Vertical Offset
Establishing the fire (startup):
- Open both intake and exhaust fully.
- Light charcoal (chimney starter recommended).
- Once coals are ashed over, place them in the offset firebox using the Minion Method.
- Close the firebox door and main chamber door.
- Let the temperature begin to climb, then gradually close the intake as you approach target temperature.
Holding steady temperature:
- Once at target (e.g., 250°F), reduce the intake to the smallest opening that maintains the temperature.
- Keep exhaust at least ¾ open.
- Monitor every 45–60 minutes.
Adding fuel without killing the fire:
- Open the side access door briefly.
- Add unlit charcoal or a few pre-lit coals.
- Close the door quickly.
- Temporarily open the intake a bit more for 5–10 minutes to help the new fuel catch, then return to previous setting.
Common Airflow Mistakes and Fixes
- Closing the exhaust too much → dirty smoke and stalled temperature. Keep it mostly open.
- Making big damper changes → temperature rollercoaster. Change slowly.
- Ignoring the intake as the main control → fighting the fire instead of guiding it.
- Letting ash build up → restricted oxygen and dropping temperature.
- Opening the main door frequently → massive heat and smoke loss. Use the side access whenever possible.
4. Master the Minion Method
The Minion Method is the most reliable way to achieve long, steady, low-and-slow temperatures (225–275°F) on a charcoal smoker with minimal refueling. It is especially effective on offset and vertical offset smokers like the Sophia & William.
What the Minion Method Actually Is
You fill the firebox or charcoal basket mostly with unlit charcoal, then add a small amount of fully lit charcoal in one area. The fire slowly spreads from the lit coals into the unlit ones, creating a controlled, long-burning fire that can last 8–16+ hours depending on the amount of charcoal and airflow. It was popularized by Jim Minion and remains the gold-standard technique for charcoal smoking.
Why It Works So Well
- Prevents temperature spikes that happen when you dump a full chimney of lit coals.
- Delivers a slow, progressive burn instead of a fast, intense one.
- Produces cleaner smoke once the fire is established.
- Requires fewer interventions during long cooks (brisket, pork butt, etc.).
- Works especially well with the natural draft of a vertical offset design.
Step-by-Step: How to Execute the Minion Method Perfectly
- Prepare the charcoal — Fill the offset firebox ¾ to completely full with unlit charcoal. Optional: Place a few wood chunks mixed into the unlit charcoal or on top for smoke flavor.
- Light a small amount of charcoal separately — Use a chimney starter filled only ¼ to ⅓ full (roughly 15–30 coals). Wait until the coals are fully ashed over (gray on the outside), usually 15–20 minutes.
- Place the lit coals — Dig a small well or clear a space on one side of the unlit charcoal bed. Carefully pour or place the fully lit coals into that spot.
- Set the airflow immediately — Open the intake damper fully and the exhaust mostly open at the start. Close the doors and let the temperature begin to climb.
- Stabilize the temperature — As the smoker approaches your target (usually 250°F), begin closing the intake damper gradually. Aim for the smallest intake opening that holds your target. Keep the exhaust at least ¾ open.
- Maintain during the cook — Check every 60–90 minutes once stable. If temperature drops, open the intake slightly or add a few pre-lit coals. Empty the ash tray as needed.
Recommended Starting Amounts (Approximate)
| Cook Length | Unlit Charcoal | Lit Coals (chimney) | Expected Duration |
|---|---|---|---|
| 6–8 hours | ¾ full firebox | ¼ chimney | Reliable for ribs, chicken |
| 10–14 hours | Full firebox | ⅓ chimney | Ideal for pork butt, brisket |
| 14–18+ hours | Full + extra on hand | ⅓–½ chimney | Long overnight cooks |
Pro Tips for Mastery on the Sophia & William Vertical Offset
- The vertical design already promotes even heat rise, so the Minion Method pairs extremely well with it.
- Use the side access door and water-filling door to make adjustments without opening the main chamber.
- Place a water pan in the main chamber or use the side water door — it buffers temperature swings and improves moisture.
- Mark your damper positions with tape or a paint pen once you find the sweet spots for 225°F, 250°F, and 275°F.
- In cold or windy weather, start with slightly more lit coals and keep the intake open a bit more than usual.
Common Mistakes and How to Avoid Them
- Adding coals that are not fully lit → temperature drop and dirty smoke. Wait until they are fully ashed.
- Using too many lit coals at the start → temperature spike that is hard to bring down.
- Closing the exhaust too much → thick white smoke and poor draft.
- Opening the main door frequently → large temperature swings. Use side access instead.
- Ignoring ash buildup → restricted airflow and dying fire.
5. Wood Chunk Smoke Profiles
Wood chunks are the preferred smoke source for charcoal offset and vertical smokers. They burn longer and more cleanly than chips, producing better flavor control during the Minion Method or any long cook.
Smoke Intensity Scale
- Mild — Subtle, sweet, or fruity. Hard to overdo.
- Medium — Balanced and versatile. Most popular everyday choices.
- Strong — Bold, assertive, or spicy. Use sparingly or mix with milder woods.
Common Wood Chunk Profiles
| Wood | Intensity | Flavor Profile | Best Meats & Foods | Notes & Tips |
|---|---|---|---|---|
| Apple | Mild | Sweet, mild fruity, slightly floral | Pork, chicken, turkey, ham, vegetables, cheese | Very forgiving. Great starter wood. |
| Cherry | Mild–Medium | Sweet, fruity, mild tartness, beautiful reddish color | Pork, chicken, turkey, beef, lamb, duck | Excellent all-purpose. Gives attractive color. |
| Peach / Pear | Mild | Soft, sweet, delicate fruit | Pork, poultry, fish, vegetables | Similar to apple but slightly more floral. |
| Pecan | Medium | Mild nutty, slightly sweet, richer than fruitwoods | Pork, beef, chicken, turkey, ribs | Often called a milder version of hickory. Very versatile. |
| Oak | Medium | Clean, medium smoky, slightly nutty | Beef (brisket), pork, lamb, sausages, everything | The most neutral “true” smoke wood. Excellent base. |
| Hickory | Medium–Strong | Bold, bacon-like, sweet & smoky | Pork ribs, pork shoulder, bacon, beef, ham | Classic American BBQ flavor. Easy to overdo. |
| Maple | Mild–Medium | Mildly sweet, subtle | Pork, poultry, vegetables, cheese, bacon | Pairs especially well with sweet rubs or glazes. |
| Mesquite | Strong | Intense, earthy, slightly bitter if overused | Beef (short cooks), dark meat poultry, game | Very strong. Best mixed 20–30% with milder wood. |
| Walnut | Strong | Heavy, slightly bitter, earthy | Red meat, game (use sparingly) | Often mixed with milder woods. Can turn bitter quickly. |
| Alder | Mild | Light, delicate, slightly sweet | Fish (especially salmon), seafood, chicken, vegetables | Traditional for Pacific Northwest-style smoking. |
Recommended Combinations
- Brisket / Beef: Oak + a little hickory or mesquite, or pure oak.
- Pork ribs / pork butt: Hickory + cherry, or pecan + apple.
- Chicken / turkey: Apple, cherry, or pecan (alone or mixed).
- All-purpose everyday mix: 50% oak + 50% cherry or pecan.
- Sweet & colorful: Cherry + apple.
- Bold classic: Hickory + oak (start with more oak).
Practical Tips for Using Wood Chunks
- Start with 2–4 fist-sized chunks for a 6–10 hour cook. Less is almost always better.
- Place chunks on or near the lit coals at the beginning of the Minion Method setup, or add them once the fire is clean and producing thin blue smoke.
- Use true chunks (roughly 2–4 inches), not chips or pellets. No need to soak.
- Avoid bark-heavy pieces if possible (can create bitter notes).
- Aim for thin blue smoke. Thick white smoke creates bitter flavors.
Woods to Avoid
- Softwoods (pine, fir, spruce, cedar) — contain resins that create harsh, unpleasant smoke.
- Treated, painted, or unknown scrap wood.
- Green/fresh wood — produces excessive creosote and bitter flavors.
6. Smoke Ring Chemistry
The smoke ring is the pink or reddish layer that forms just beneath the surface of properly smoked meat. It is one of the most recognizable visual signatures of low-and-slow charcoal or wood smoking, but it is purely a chemical reaction — not a sign of doneness, moisture, or superior flavor.
The Core Chemistry
The smoke ring forms through a reaction between gases produced by burning wood or charcoal and the meat pigment myoglobin.
- Combustion produces nitrogen oxides — When wood or charcoal burns, it generates small amounts of nitric oxide (NO) and nitrogen dioxide (NO₂).
- These gases dissolve into the moist surface of the meat — The meat’s surface must stay relatively cool and moist for the gases to penetrate. This is why the ring usually forms only in the outer ¼-inch or so.
- Reaction with myoglobin — Myoglobin reacts with nitric oxide to form nitrosomyoglobin. When the meat is later cooked, this converts to a stable pink compound called nitrosohemochrome that resists normal browning.
Key Factors That Influence Smoke Ring Formation
| Factor | Effect on Smoke Ring | Practical Implication |
|---|---|---|
| Surface moisture | Essential — dry surfaces form little or no ring | Keep meat moist early in the cook; water pans help |
| Temperature | Best below ~170°F at the surface | Low-and-slow (225–275°F) favors the ring |
| Time | Most of the ring forms in the first 2–4 hours | Early clean smoke matters most |
| Fuel | Wood and charcoal both produce NO/NO₂ | Clean-burning wood chunks enhance it |
| Airflow | Good draft carries the gases across the meat | Proper damper settings help |
| Meat pH & freshness | Fresher meat with higher myoglobin responds better | Older or previously frozen meat may show a weaker ring |
Common Myths vs Reality
- Myth: A smoke ring means the meat is fully smoked or more flavorful. Reality: The ring is only a visual byproduct. Flavor comes from smoke compounds, Maillard reaction, rendered fat, and seasoning.
- Myth: Only wood smoke creates a ring. Reality: Charcoal alone can produce a smoke ring. Adding wood usually intensifies it.
- Myth: The ring indicates the meat is undercooked. Reality: The pink color is chemically stabilized and remains even when the meat is fully cooked.
- Myth: You need heavy white smoke for a good ring. Reality: Thin blue smoke is ideal.
How to Encourage a Strong Smoke Ring
- Start with a clean fire (Minion Method + good airflow).
- Keep the meat surface moist in the early hours (water pan or occasional spritzing helps).
- Maintain steady temperatures in the 225–275°F range.
- Avoid opening the main chamber frequently.
- Use a combination of charcoal and a mild-to-medium wood (oak, hickory, pecan, or cherry).
- Do not wrap the meat too early if a pronounced ring is a goal.
7. Maillard Reaction Chemistry
Manual step: add at least three useful, article-specific FAQ answers · Manual step: write a short Quick Answer near the top, or set a manual excerpt for this post. Auto-copying the intro has been removed to prevent duplicate text. · Manual step: complete the visible FAQ section with at least three useful answers · Manual step: cite a relevant manufacturer, manual, safety, or other authoritative source
The Maillard reaction is one of the most important chemical processes in cooking, especially in grilling and smoking. It is responsible for the deep brown color, rich savory (umami) flavors, and complex aromas that develop on the surface of seared or smoked meats.
What the Maillard Reaction Is
The Maillard reaction is a series of non-enzymatic chemical reactions between:
- Amino acids (from proteins in meat)
- Reducing sugars (naturally present in meat or added in rubs/glazes)
It occurs when these compounds are heated together under relatively dry conditions, typically starting around 280–330°F (140–165°C) and accelerating at higher temperatures. It is distinct from caramelization (which involves only sugars) and from pyrolysis (burning).
Simplified Chemical Pathway
- Initial condensation — A reducing sugar reacts with an amino acid, forming a glycosylamine.
- Amadori rearrangement — The glycosylamine rearranges into a more stable compound (Amadori product).
- Further degradation & fragmentation — At higher temperatures these compounds break down into many smaller, highly reactive molecules.
- Polymerization & flavor formation — These fragments recombine into melanoidins (brown pigments) and hundreds of volatile aroma compounds that create savory, roasted, nutty, and meaty flavors.
Key Conditions That Control the Maillard Reaction
| Factor | Effect on Maillard Reaction | Practical Impact in BBQ / Grilling |
|---|---|---|
| Temperature | Starts ~280°F, accelerates strongly above 300–350°F | Low-and-slow produces limited Maillard; searing creates much more |
| Moisture | Inhibited by high surface moisture | Dry surface = stronger browning and flavor |
| pH | Favored by slightly alkaline conditions | Some cooks add a touch of baking soda to rubs (use sparingly) |
| Time | Longer exposure at moderate heat still produces some reaction | Extended smoke time contributes mild Maillard notes |
| Sugar content | More reducing sugars → faster and darker browning | Rubs with sugar, honey, or fruit accelerate it |
Maillard Reaction vs. Related Processes
- Maillard reaction — Amino acids + reducing sugars → complex savory flavors + brown color.
- Caramelization — Sugars alone heated to higher temperatures (~320°F+) → sweet, nutty, buttery notes.
- Smoke deposition — Adds separate smoky flavor compounds on top of Maillard flavors.
- Smoke ring — Nitrogen oxides + myoglobin → pink color only (no major flavor contribution).
Practical Application on a Charcoal Offset / Vertical Smoker
During low-and-slow smoking (225–275°F): Only limited Maillard reaction occurs because surface temperatures stay relatively low and moisture is often present. You still get some flavor development over many hours, especially if the surface dries (the “bark”). To maximize Maillard flavors:
- Start with a dry surface (pat meat dry before applying rub).
- Use a rub that contains some sugar for faster browning.
- Maintain good airflow so the surface can dry rather than steam.
- Near the end of the cook, increase temperature for 15–45 minutes to drive more Maillard development and set the bark.
- For steaks, burgers, or chops: finish with a high-heat sear (450°F+) over direct coals.
Bark formation: The dark, flavorful crust on smoked brisket or pork is largely the result of Maillard reaction products combining with smoke compounds, dehydrated spices, and rendered fat.
Bottom Line
The Maillard reaction is the primary source of the deep, savory, roasted flavors and appealing brown color in grilled and smoked meats. On a vertical offset charcoal smoker you get mild Maillard development during the long smoke, then can intensify it with higher heat at the end or a final sear. Combining clean smoke, good bark formation, and deliberate Maillard development produces the complex flavor profile that defines excellent barbecue.
FAQ
How long does assembly take and is it difficult? Expect about 90 minutes for the vertical 961 sq. in. model. Instructions are primarily pictorial. Work methodically with bolts left loose until everything is aligned; attaching the bottom shelf early helps. Most users complete it solo with basic tools included or standard household tools.
How do I maintain steady temperatures for long cooks? Use the side dampers and exhaust to fine-tune airflow. Start with a solid bed of ashed-over charcoal in the offset firebox, add fuel sparingly through the side door, and consider a water pan. A secondary digital probe at grate level is recommended because lid gauges can read higher than the actual cooking zone. Practice on a dry run to learn the unit’s response.
What is the real-world capacity and best uses? The five adjustable racks plus hanging space and offset chamber comfortably support large gatherings (multiple racks of ribs, several whole birds or butts, brisket, and sides at once). It excels at low-and-slow smoking where even vertical heat distribution shines. Adjustable grate heights let you customize for tall items or maximize layers for smaller pieces.
What cleaning and storage steps keep it performing well? After cooling, empty the push-out ash tray and grease cup, brush the grates, and wipe surfaces. Cover when not in use to limit weather exposure. Periodic inspection of seals, dampers, and wheels, plus high-heat paint touch-ups on any chips, extends service life.
These answers are drawn directly from the product’s design features and typical user experience with this vertical offset model. Always consult the specific documentation shipped with your unit for model-exact details.
Complete Mastery Guide for the Sophia & William Heavy-Duty Vertical Offset Charcoal Smoker Fire Management • Airflow • Minion Method • Wood Profiles • Smoke Ring • Maillard Reaction
Sophia & William Heavy-Duty Vertical Offset Charcoal Smoker – Complete Mastery Guide
Best for: Backyard grill buyers
A solid option worth comparing before you buy.
Check Price on Amazon