
Updated: August 6, 2026
Quick Answer: Most gas grill problems trace to restricted gas flow, an ignition fault, dirty burners, a blocked venturi, grease buildup, or a damaged fuel component. Start with the lid open and every control off. If you smell gas, hear hissing, see fire near the controls, or find a damaged hose, stop using the grill and shut off the fuel only if it is safe to do so.
A gas grill that will not light, will not get hot, or suddenly burns with yellow flames is usually giving you a useful clue. The safest approach is to diagnose the symptom in order instead of replacing parts at random.
This guide covers common freestanding propane grills and points out where natural-gas models differ. Your grill’s owner’s manual remains the final authority because lighting sequences, burner designs, regulators, clearances, and approved replacement parts vary by model.
Stop-now warning: Do not continue troubleshooting a hot or burning grill. Move people away and call 911 if a fire cannot be controlled safely. Never use water on a grease fire, never search for a gas leak with a flame, and never modify an orifice, valve, manifold, regulator, hose, or propane cylinder.
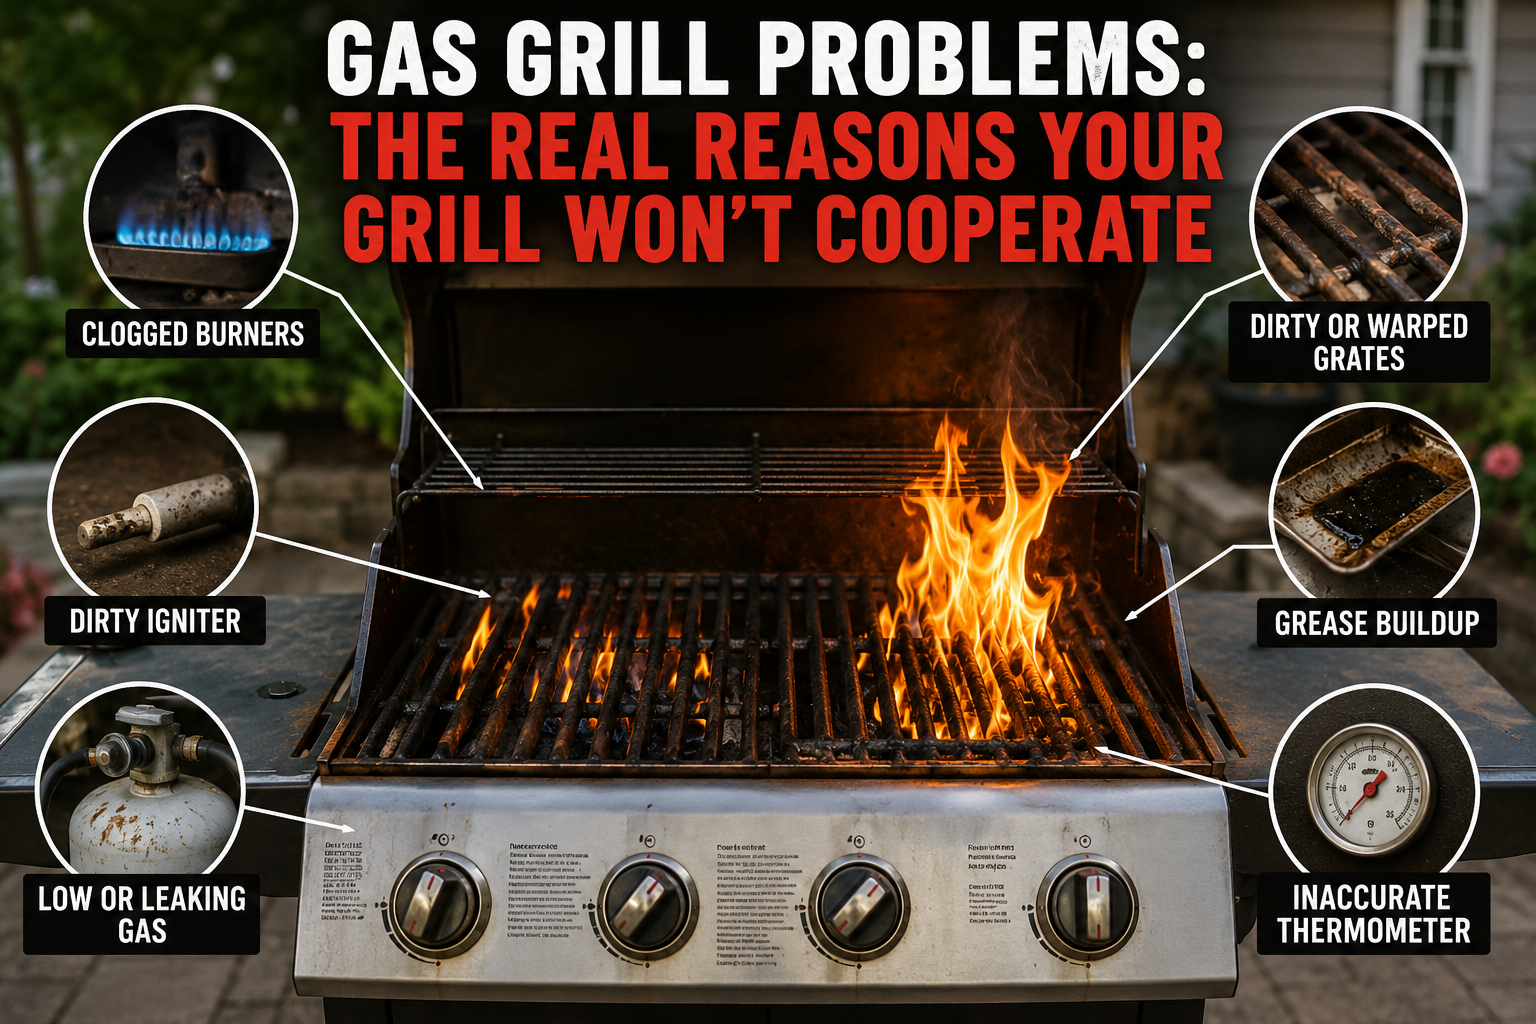
Gas Grill Troubleshooting at a Glance
| Symptom | Likely area to check | First safe action |
|---|---|---|
| No click and no spark | Ignition battery, button, module, or wiring | Turn the gas off; inspect the ignition system while the grill is cool |
| Clicks but will not light | Fuel supply, electrode position, moisture, dirty burner, or lighting sequence | Open the lid, turn controls off, and wait before another attempt |
| All burners have tiny flames | Empty cylinder, restricted flow, connection, or regulator | Check fuel and perform a leak test before resetting the gas-flow system |
| Only one burner is weak | Clogged burner ports, crossover channel, or damaged burner | Let the grill cool, then inspect and clean according to the manual |
| Mostly yellow flame or black soot | Airflow restriction, dirty burner, insect web, or fuel mismatch | Turn the grill off and inspect the burner and venturi |
| Fire or heat behind the knobs | Flashback caused by restricted burner or venturi flow | Shut off the fuel if safe and stop using the grill |
| Continuous fire under the cookbox | Grease tray or catch-pan fire | Turn off burners and fuel if safe; close the lid; never add water |
| Propane odor or hissing | Cylinder, connection, hose, regulator, valve, or manifold leak | Do not light; close the cylinder if safe, leave the area, and get help |
| Burner lights, then goes out | Wind, restricted fuel flow, dirty burner, or failing component | Turn off the fuel, open the lid, and allow gas to clear |
| Black flakes fall from inside the lid | Carbonized grease, not always peeling paint | Clean the cool lid interior using the method in the owner’s manual |
What You Can Safely Check—and When to Stop
A cool, unlit grill allows several low-risk checks: confirming that the cylinder is not empty, verifying that every control knob is off, inspecting the hose for cracks or heat damage, changing an ignition battery, cleaning removable parts as the manual directs, and performing a bubble leak test at approved connection points.
Stop the do-it-yourself work when the problem involves a leaking or damaged cylinder, a valve or manifold, fire damage, an incorrect fuel conversion, a hose that has melted or split, persistent gas odor, or a leak that remains after an approved connection is tightened. Those problems belong with the propane retailer, grill manufacturer, gas utility, fire department, or a qualified gas-appliance technician.
Before buying a part, find the grill’s model and serial number. Match the fuel type, rated pressure, connection, and part number. A component advertised as “universal” is not automatically compatible with your grill.
Problem 1: The Gas Grill Will Not Light
“Will not light” can describe three different failures: no gas reaches the burner, gas reaches the burner but the spark misses it, or the burner is too dirty or damaged to carry flame. The sound and flame pattern help separate them.
Start with the lighting sequence
- Move combustible items away from the grill and open the lid.
- Confirm that every burner control—including side and sear burners—is off.
- Inspect the cylinder, hose, regulator connection, and area under the cookbox for obvious damage.
- For propane, slowly open the cylinder valve as your manual directs. Allow several seconds for the line to pressurize before turning on a burner.
- Ignite only the burner named first in the manufacturer’s instructions, then light the remaining burners in the specified order.
If the burner does not ignite promptly, turn the control and fuel supply off. Keep the lid open and wait at least five minutes—or the longer interval in your manual—before trying again. The U.S. Consumer Product Safety Commission (CPSC) warns that unburned propane can collect beneath the grates and create an explosion hazard.
Check whether the problem affects one burner or all burners
If no burner lights, look first at the fuel supply, cylinder connection, regulator, and lighting sequence. If one burner fails while another operates normally, the fault is more likely local: a blocked port, dirty crossover channel, displaced electrode, or damaged burner.
Do not repeatedly click the igniter while gas accumulates. Each failed attempt should end with the controls off and enough ventilation time for the gas to disperse.
Problem 2: The Grill Lights but Has Weak Flame or Low Heat
When every burner is weak immediately after a cylinder change or an unusual startup, restricted gas flow is a reasonable suspect. Many propane grill hose-and-regulator assemblies include a safety mechanism that can restrict flow when the system senses a sudden demand that resembles a leak. Grill owners often call this “bypass mode.”
Do a leak test first. Weber’s official bypass guidance says to check for a gas leak before trying to restore full flow because leak detection is the safety device’s purpose. If bubbles grow during a leak test, do not use the grill.
A cautious propane flow reset
Procedures differ, so use the reset in your owner’s manual when one is provided. A common sequence is:
- Open the grill lid. Turn every burner control off.
- Close the propane cylinder valve.
- Disconnect the regulator only if your manufacturer’s procedure tells you to do so. Inspect the connection for dirt or damage.
- Wait for the period stated in the manual. Some manufacturers direct owners to briefly open and then close the burner controls while the cylinder is disconnected to release residual pressure.
- Reconnect the regulator squarely and securely. Do not force the connector.
- Perform the approved bubble leak test.
- With all burner controls still off, open the cylinder valve slowly and wait several seconds for pressure to equalize.
- Light the grill in the exact order listed in its manual.
Do not adopt a one-size-fits-all rule about leaving the cylinder valve only partly open. Valve directions vary, and the correct final position is the one specified by the cylinder and grill manufacturer. The important points are to begin with all burner controls off, open the fuel supply slowly, allow the system to pressurize, and follow the model’s lighting sequence.
If the grill remains weak, confirm that the cylinder contains fuel and inspect the burners. A regulator should not be replaced merely because one reset failed. Repeated restricted flow, visible damage, a failed leak test, or performance that remains poor after cleaning calls for model-specific manufacturer support or qualified service.
Problem 3: The Igniter Clicks but Produces No Useful Spark
An electronic igniter can click even when its battery is weak, a wire is loose, the electrode is wet or dirty, or the spark is jumping to the wrong piece of metal. A piezo igniter normally has no battery, so do not pull apart its button looking for one unless the manual identifies it as battery-powered.
Safe ignition checks
- Turn off the gas first. Inspect the ignition system only when the grill is cool.
- Replace the battery if equipped. Match the battery type and polarity shown in the manual, and check the cap for corrosion.
- Check the wires. Reconnect loose push-on terminals. Replace burned, cracked, or chewed wiring instead of taping over serious damage.
- Clean and dry the electrode. Remove grease gently with the method recommended by the manufacturer. Cracked ceramic insulation usually means replacement.
- Check the gap and position. The electrode must sit where the manufacturer intended; bending it blindly can crack the ceramic or move the spark farther from the gas stream.
Can you use a match-light test?
Only if the owner’s manual provides a manual-lighting procedure. A typical approved sequence keeps the lid open and burner controls off, opens the gas supply, places a lit match or long-reach lighter at the designated lighting point, and only then turns on the specified burner. Do not improvise by dropping a match into the cookbox or allowing gas to flow before the flame is in position. Weber’s manual-lighting guidance is a useful example, but your own manual controls.
If the burner lights manually, gas is reaching it and the ignition system becomes the main suspect. If it still does not light, turn everything off, wait for gas to clear, and troubleshoot fuel flow and burner condition instead.
Problem 4: Yellow Flame, Black Soot, Popping, or Uneven Heat
A healthy flame pattern depends on the grill design, so compare it with the drawing or photograph in your manual. On many gas grills, the flame is mostly blue and stable, with occasional yellow tips. Large lazy yellow flames, black soot on cookware, popping, or flames lifting away from the burner point to an air-and-fuel problem that should be corrected before cooking.
Clean the burner without making the problem worse
- Shut off the gas and disconnect the cylinder if the manual requires it. Let the grill cool completely.
- Remove the grates and heat tents, bars, or diffusers as directed.
- Inspect the burner for cracks, splits, collapsed metal, or holes larger than the original ports.
- Brush across the burner ports, not lengthwise, using the tool specified by the manufacturer.
- Clear individual ports only with an approved tool that will not enlarge the holes or break off inside them.
- Inspect the venturi or burner inlet for spider webs, insect nests, grease, and debris. The CPSC recommends checking venturi tubes at least yearly and clearing blockages with a pipe cleaner or wire.
- Reinstall every burner so its inlet is correctly seated over the valve orifice before reconnecting and testing the grill.
Weber notes that clogged burner ports cause uneven flame and recommends brushing across the ports. Replace a burner when it is cracked, split, structurally weakened, or cannot be cleared safely—not merely because its surface looks discolored.
2026 cleaning-tool warning: The CPSC recalled several metal wire-bristle grill-brush models because detached bristles can stick to grates or food and cause serious injury if swallowed. Check your brush against the CPSC recall database, inspect the cooking surface before every cook, and consider a non-wire grate-cleaning tool. A manufacturer-specified burner-cleaning tool should be kept separate from anything used on food-contact surfaces.
Problem 5: Fire or Excessive Heat Near the Control Panel
Flames behind the control panel, unusually hot knobs, or fire at the burner inlet can indicate flashback: combustion has traveled backward toward the air intake instead of remaining at the burner ports. A blocked or incorrectly installed burner or venturi can contribute to this condition.
If flashback occurs, stop cooking immediately. Turn off the gas at the source only if you can reach it without approaching flames or extreme heat. Move everyone away. If the fire continues or you are unsure, call 911. Do not move the grill or propane cylinder while it is burning.
After the grill is completely cold, do not simply relight it. Inspect the burner inlet, venturi, valve alignment, hoses, wiring, and control area for blockage and heat damage. A grill that experienced sustained fire near its controls should be evaluated by the manufacturer or a qualified technician before reuse.
Problem 6: Grease Fire or Repeated Flare-Ups
A brief flame where fat hits a hot surface is a flare-up. Continuous flames below the burners or in the grease tray, heavy dark smoke, or fire that continues after the food is moved suggests accumulated grease is burning.
What to do
- Turn off the burner controls and fuel supply if you can do so safely.
- Close the lid to reduce oxygen.
- Never pour water on burning grease.
- If the fire does not go out immediately, grows, or threatens the cylinder or a structure, move away and call 911. Use an appropriate fire extinguisher only if the fire is small, you know how to use it, and you have a clear escape route.
- Do not reuse the grill until it is cold, cleaned, and inspected for damage.
Prevention is easier: scrape the cool grease tray, empty the catch pan, keep the drain path open, trim excessive exterior fat, and do not leave the grill unattended. There is no universal “every few cooks” schedule; inspect more often when cooking fatty foods and follow your manual’s maintenance interval.
Problem 7: Gas Odor, Hissing, or a Failed Leak Test
Propane is odorized so people can detect a leak. A persistent propane odor, hissing, a visible vapor cloud, or flames at the cylinder is an emergency—not an ordinary repair project.
If you suspect an active cylinder leak: Eliminate flames and ignition sources. If there is no fire or visible vapor cloud and you can do it without risk, close the cylinder valve. Leave the area and call 911 or the fire department. Do not transport a leaking cylinder. Have the cylinder and appliance inspected before using them again. This follows current guidance from the Propane Education & Research Council.
Routine bubble test after connecting a cylinder
A bubble test is a preventive check, not a reason to remain beside an obvious active leak. With the grill outdoors, cool, and every burner control off:
- Apply approved leak-detection solution or thick soapy water to the cylinder valve area and connection points named in the manual.
- Slowly open the cylinder valve while watching the solution.
- Growing bubbles indicate a leak. Close the valve, correct a simple connection only as the manual permits, and retest.
- If bubbles remain, close the valve and contact the propane retailer, grill manufacturer, or a qualified technician. Do not light the grill.
Never test for leaks with a match, lighter, or other flame. Do not use tape, sealant, or a makeshift gasket on a connection unless the manufacturer specifically requires that material at that location.
Natural-gas grills need a different response
If a natural-gas grill smells of gas, turn off the appliance and the accessible manual shutoff only if it is safe. Leave the area and contact the gas utility or 911 from a safe location. Do not adjust the home’s gas piping, quick disconnect, valves, or appliance orifices yourself. Never connect a propane grill to natural gas—or the reverse—without a manufacturer-approved conversion system installed as directed.
Problem 8: The Flame Goes Out During Cooking
Wind, an empty cylinder, restricted flow, dirty burners, or a failing component can extinguish a burner. The dangerous response is immediate relighting while unburned gas remains in the cookbox.
Turn off every burner and the fuel supply. Open the lid and wait at least five to ten minutes, following the longer time stated in your manual. Then check fuel level, wind exposure, burner condition, and connections before a new lighting attempt. Do not move an operating grill into a garage, porch, or other enclosed or covered area to escape the wind.
Problem 9: Rust, Black Flakes, and Worn Components
Black flakes inside the lid
What looks like peeling paint is often carbonized grease and smoke residue releasing from the lid interior. On a cool grill, remove loose buildup using the cleaning method in the manual. Do not paint the inside of a lid or cookbox.
Rusty cooking grates
Bare cast-iron grates with light surface rust may be restorable if they remain solid. Porcelain-coated grates that are deeply chipped, sharp, or rusting through are replacement candidates. Use care around any loose coating and match replacements to the exact grill model.
Rusty burners, firebox, or frame
Surface discoloration on a burner is not the same as structural failure. Replace burners that are split, perforated beyond their designed ports, crumbling, or unable to seat correctly. Through-rust in the firebox, supports, cart, or cylinder mount can make the grill unstable or expose surrounding surfaces to heat. Those defects can justify replacing the grill even if it still lights.
After a fire, do not rely on appearance alone. Heat can damage valves, hoses, wiring, control components, and coatings. Ask the manufacturer or a qualified technician whether the grill can be returned to service.
Should You Repair the Grill or Replace It?
| Repair may make sense | Professional service or replacement is safer |
|---|---|
| The firebox and cart are solid and stable | The firebox, frame, or cylinder support has through-rust |
| The problem is isolated to a battery, approved igniter part, grate, heat tent, or removable burner | A valve, manifold, gas line, regulator, hose, or cylinder is leaking or fire-damaged |
| The manufacturer identifies a correct replacement part | The model label is missing and compatibility cannot be verified |
| There is no open safety recall affecting continued use | The grill is recalled and the remedy requires stopping use |
| The grill has not suffered a significant fire or uncontrolled overheating event | Fire or heat damage extends into the control or fuel system |
A percentage-of-new-price rule is too crude. Availability of approved parts, structural condition, recall status, fuel-system safety, and your ability to complete the work correctly matter more than a made-up cutoff.
Useful parts and supplies to search by model number
- Model-specific regulator and hose assemblies on Amazon
- Model-specific gas grill igniters on Amazon
- Model-specific replacement burners on Amazon
- Non-wire grill-grate cleaning tools on Amazon
- Gas leak-detection solution on Amazon
Affiliate note: These are search links, not endorsements of every result. Verify the exact model, fuel type, fittings, and manufacturer approval before ordering a gas-handling part.
Five-Minute Safety Check Before the Next Cook
- Set the grill outdoors on a stable surface with the clearances required by its manual.
- Open the lid before lighting.
- Confirm every burner is off before opening the propane valve.
- Inspect the hose for cracks, brittleness, holes, abrasion, sharp bends, and contact with hot or greasy surfaces.
- Check the cylinder and connection for damage, then bubble-test after reconnecting.
- Make sure the grease tray, drain, and catch pan are not overloaded.
- Look for nests, spider webs, and debris after storage.
- Keep children and pets away, stay with the grill, and have an appropriate fire extinguisher accessible.
- Check the grill and cleaning tools for current CPSC recalls.
Bottom Line
Gas grill problems are easier to solve when you follow the symptom instead of guessing. Weak flames across every burner point toward fuel supply or restricted flow; one bad burner points toward a local blockage or part; clicking without ignition separates spark problems from gas-flow problems; yellow flames and soot demand burner and venturi inspection. Gas odor, hissing, flashback, damaged fuel parts, and uncontrolled fire are stop-now conditions—not opportunities to keep experimenting.
Start with the model’s manual, make only low-risk checks on a cool grill, and use approved replacement parts. A careful diagnosis can save a sound grill, but no repair is worth gambling with a leaking or fire-damaged fuel system.
Frequently Asked Questions
Why does my gas grill click but not light?
The igniter may be sparking away from the burner, the electrode may be wet or dirty, the battery may be weak, or gas may not be reaching the burner. Turn the gas off, let accumulated gas clear, inspect the cool ignition system, and use only the manual’s approved match-light test to separate an ignition fault from a fuel-flow problem.
Why are all my burner flames suddenly small?
Check whether the propane cylinder is empty and whether the grill was started with every burner control off. A rapid startup or sudden gas demand can activate restricted-flow protection on some regulator assemblies. Leak-test first, then follow the manufacturer’s reset and lighting sequence.
Why is one burner weak while the others are normal?
That pattern usually points to a local issue rather than the main fuel supply. Once the grill is cool and the gas is off, inspect that burner’s ports, crossover channel, inlet, and seating for blockage or damage.
Is a little yellow in a gas grill flame normal?
Occasional yellow tips can be normal on many grills, but large lazy yellow flames, soot, popping, or flames lifting off the burner are not. Compare the flame with your manual and inspect the burner and venturi before cooking again.
Can I manually light a gas grill when the igniter fails?
Only when the owner’s manual gives a manual-lighting method. Keep the lid open, controls off, and follow its exact order for the gas supply, lit match or long-reach lighter, and designated burner. If the burner does not ignite promptly, turn everything off and let the gas clear.
What should I do if I smell propane near my grill?
Do not light the grill or create sparks. If it is safe and there is no fire or visible vapor cloud, close the cylinder valve, leave the area, and call 911, the fire department, or your propane retailer as appropriate. Do not transport a leaking cylinder or reuse the grill until it has been inspected.
Should I replace a gas grill regulator myself?
Only if the grill manufacturer treats it as an owner-replaceable assembly and you have the exact approved part and instructions. Never substitute an incompatible regulator or alter gas fittings. Leak-test all approved reconnections before lighting.
Are black flakes inside the grill lid peeling paint?
Often they are carbonized grease and smoke deposits, not paint. Clean the cool lid interior as the manual directs. Do not paint the inside of the lid or cookbox; contact the manufacturer if the actual coating or metal is failing.