Updated: July 12, 2026
Here’s your updated HTML content with relevant internal links added:“`htmlEssential Charcoal Grill Maintenance helps shape the topic of this article.
charcoal grill maintenance tips
Over time, your charcoal grill will show signs of wear, but don’t let those minor scuffs and ash piles fool you into thinking it’s a goner. Maintaining your charcoal grill isn’t some huge, daunting task; in fact, it’s pretty simple. You’re just a few easy steps away from ensuring your grill stays in peak condition, preventing rust and keeping it ready for countless delicious meals, especially if you check out our Outdoor Grill & Smoker Barrel Product Guide for useful tips.
Key Takeaways:
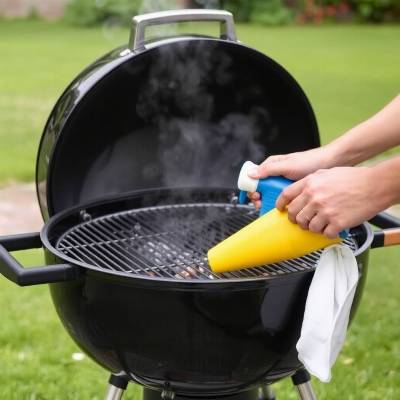
You know, a clean grill grate is super important, so when you’re firing up the charcoal, let that grate get good and hot for about five minutes. That intense heat burns off old food bits, and then a quick scrub with a good brush makes it sparkling clean. It’s just easier that way, trust me.
After you’ve cleaned the grate, you might wonder about oiling it. A little oil on a paper towel, wiped gently with tongs, helps keep your food from sticking. Just don’t overdo it, because too much oil means a big flare-up, and nobody wants that. Sometimes, if the food itself is oiled, you can skip this step, but when in doubt, a light coat is always a good idea.
This one sounds a little weird, but don’t scrub your grate after cooking, not right away anyway. Yeah, I know, it’s covered in burnt stuff, but leaving that blackness on actually protects the grate from rust between cooks. Just knock off any big pieces of food, and you’re good until the next grilling session.
That ash at the bottom? You gotta get rid of it. If you leave a pile of ash in there, it can soak up moisture and turn into this rock-hard, cement-like mess that’s nearly impossible to clean out later. So, grab a bucket, dump that ash, and save yourself a huge headache down the road. Also, consider using the Oklahoma Joe’s Smoker for optimal ash management and cooking experience.
And finally, a grill cover is your best friend. Seriously, if your grill lives outside, a cover is non-negotiable. I learned this the hard way with a rusty, unusable grill after just two months. A simple cover protects your grill from the elements and will keep it cooking happily for years, even if it’s a cheap knock-off.
What’s the deal with different grill types?
Understanding the various types of charcoal grills helps you appreciate why certain maintenance steps are so important. Each design, from the classic kettle to the more specialized ceramic egg, brings its own quirks and benefits to the grilling experience. You’ve probably seen a few different styles out there, and knowing what makes them tick can really help you get the most out of your setup and keep it running smoothly for years.
The basic idea behind all charcoal grills is the same – hot coals cooking delicious food – but the execution varies quite a bit. This section isn’t about telling you which one is “best,” but rather highlighting how their construction impacts things like airflow, heat retention, and ultimately, the way you’ll need to care for them. Knowing these distinctions will make your maintenance routine more effective, whether you’re dealing with ash disposal, grate cleaning, or protecting your grill from the elements.
| Kettle grills: The classic, often seen in backyards everywhere. Simple design, good airflow, usually less expensive. Ceramic kamado grills: Like Big Green Egg. Excellent heat retention and insulation, versatile for smoking and high-heat searing. Barrel grills: Larger cooking surface, often with offset smokers. Good for bigger cooks or multiple zones. Portable grills: Smaller, lighter, designed for tailgating or camping. Convenience is key. Cart grills: Kettle or barrel grills mounted on a cart with side tables and storage. More stable and feature-rich. | Different grill types have unique features that affect their performance and maintenance needs. For example, a ceramic grill’s superior insulation means it holds heat better, so you might use less charcoal, but you’ll also need to be mindful of its weight and fragility. Kettle grills are incredibly popular for a reason – they’re straightforward and effective. Their open design means good airflow, which is great for getting coals hot quickly, but they can be more susceptible to external temperatures. Ultimately, the type of charcoal grill you choose often comes down to your personal grilling style, the space you have, and your budget. Knowing the specific characteristics of your grill will guide you in applying the best maintenance practices, ensuring it serves you well for many seasons. |
My take on the classic kettle vs. fancy ceramic eggs
You’ve likely seen the iconic kettle grill, the backyard workhorse for generations of grill masters. These grills are fantastic because they’re relatively inexpensive and incredibly versatile. You can do direct searing, indirect cooking, and even some basic smoking with a kettle, and they’re pretty forgiving if you’re still learning the ropes.
The main thing you’ll notice with a kettle is that they can lose heat a bit quicker than their ceramic cousins, so managing your airflow and charcoal can be a more active process, which some folks actually prefer. On the other hand, those ceramic kamado grills, like the Big Green Egg, are a whole different beast. Their thick ceramic construction means they hold heat incredibly well, almost like an outdoor oven.
This insulation makes them fantastic for low-and-slow smoking, where maintaining a consistent temperature for hours is key, and they can also reach screaming hot temperatures for perfect searing. The downside? They’re usually a lot heavier and more expensive, and because they retain heat so well, it can take a bit longer to cool down after you’re done cooking, so you need to be patient.
So, when it comes to maintenance, you’ll find that while both need their grates cleaned and ash removed, the ceramic eggs often require less charcoal due to their efficiency, which means less ash in the long run. However, their weight means moving them around for deep cleaning can be a two-person job, and you have to be careful not to drop anything heavy on that ceramic.
Knowing these differences helps you set realistic expectations for both performance and the elbow grease you’ll put in.
Portable grills: honestly, are they worth the hassle?
Portable grills can be a game-changer if you’re someone who loves to take their grilling adventures on the road – think tailgating, camping trips, or even just a picnic in the park. They’re designed for convenience, usually compact and lightweight, making them easy to pack up and transport.
The trade-off, of course, is often a smaller cooking surface and sometimes less robust construction compared to their full-sized counterparts. But for quick cooks for a few people, they absolutely get the job done and let you enjoy that charcoal flavor wherever you are.
The biggest thing to consider with portable grills is managing the ash and embers, especially in outdoor settings. You’re often in places where you can’t just dump hot ash, so having a plan for safe disposal is absolutely critical.
And because they’re exposed to different environments, from sandy beaches to damp campgrounds, protecting them from rust becomes even more important. A good cover and thorough drying after each use are non-negotiable if you want that little grill to last. While they might seem like a “hassle” to some, the freedom a portable grill offers is undeniable. For more information, check out our guide on Top Charcoal Grills for Steak.
Factors that’ll actually ruin your grill if you aren’t careful
We’ve talked about what you *should* do, but let’s flip the script for a second and examine the stuff that’ll send your beloved grill to an early grave. You might think you’re doing everything right, but a few common mistakes can actually accelerate the demise of even the sturdiest charcoal cooker. Ignoring these seemingly minor details can lead to some seriously costly replacements down the line. Thou really need to pay attention here.
Why moisture is seriously your worst enemy
Rain and dew are more than just an inconvenience; they’re actively working against your grill’s longevity. Just like leaving your bicycle out in the rain, prolonged exposure to wet conditions will inevitably lead to rust, especially on those exposed metal parts. This isn’t just about surface-level discoloration; it can compromise the structural integrity of your grill over time.
Think of moisture as a sneaky little saboteur, seeping into every crevice and joint. It’s particularly dangerous when it combines with ash left in the bottom of your grill, turning into a stubborn, cement-like block. This hardened ash can be incredibly difficult to remove and will trap moisture against the metal, creating a perfect breeding ground for corrosion.
Your grill cover isn’t just for looks; it’s your first line of defense against this pervasive enemy. A good cover, combined with promptly emptying out ash, will dramatically extend the life of your grill by keeping those damaging moisture levels at bay.
The real deal about grease buildup and rust
Grease isn’t just a sticky mess; it’s a double-edged sword when it comes to your grill’s health. While a seasoned interior can be a good thing for temperature control, excessive grease buildup creates a whole different set of problems. It can trap moisture, leading to hidden rust spots that you might not even see until it’s too late.
But wait, there’s more to the grease story. That black, crusty layer on your grate after cooking? We told you to leave it for protection, right? That’s good for the grate itself, but if you let grease build up on the *inside walls* of your grill, it can become a fire hazard.
A thick layer of grease can easily ignite during a high-heat cook, creating flare-ups that are not only dangerous but can also warp metal over time. Consider the interplay between grease and rust, it’s a vicious cycle. Grease, particularly when mixed with food particles and moisture, can create an acidic environment that accelerates rust formation, especially on hinges, vents, and the lower bowl.
So, while you’re not scrubbing the inside clean, a quick wipe-down to remove *excess* accumulation is smart. It’s a delicate balance, but one that’s absolutely worth mastering for the long-term health of your grill.
My favorite maintenance tips for a happy grill
After Grilling, Resist the Urge to Clean the Grate
So, you’ve just finished up a fantastic cookout, and your grill grate is sporting the charred remnants of your delicious feast. Your first instinct might be to scrub that sucker clean while it’s still warm, right? But hold on a minute. This is where you might need to embrace a little bit of controlled grime.
For those of you who are meticulous cleaners, this might feel wrong, but leaving a certain amount of residue on the grate after cooking is actually a good thing. Sure, scrape off any big chunks of food that are still clinging on, but that thin layer of blackness that’s left behind? It’s like a superhero shield for your grate.
That protective coating helps to guard your grate between uses. Even if you’re diligent about covering your grill, this extra layer of defense works wonders against the dreaded enemy of any metal, rust. The less you scrub it down to bare metal every single time, the better it’ll hold up. The next time you fire up your grill, that initial heat will make short work of anything left over.
What to Do With Ash so it doesn’t ruin your day
That post-grilling haze, the one where you’re delightfully full of grilled goodness, can make even the simplest task feel like a monumental effort. But don’t let that meat coma trick you into ignoring the ash in your grill. Trust me, it’s a small task now that can save you a much bigger headache later.
Leaving a pile of ash in your grill is a recipe for disaster. It loves to collect moisture, and when ash and moisture mix, they create this incredibly stubborn, almost cement-like substance. This can become your biggest obstacle to cleaning your grill, making it incredibly difficult, if not impossible, to remove without some serious scraping.
The last thing you want is a permanent ash fortress at the bottom of your grill. To keep things simple, I keep a big old bucket right next to my grill. This way, when I’m done cooking, I can easily dump the ash out. This not only makes the chore way less annoying, so I’m actually more likely to do it, but it also provides a safe spot for any still-warm coals to finish extinguishing.
I stash that bucket somewhere dry, away from any potential moisture, then toss the collected ash once I’m absolutely sure there are no embers left. The hassle of ash disposal is significantly reduced when you use lump charcoal, as it produces much less ash compared to briquettes.
charcoal grill maintenance tips: A step-by-step guide to getting things sparkling
| Maintenance Task | Detailed Steps |
| Cleaning the Grate: here’s how I do it | Getting your grill grate clean before cooking is a game-changer, really. You’ve just fired up the coals, right? Let that fresh, intense heat do some of the heavy lifting for you. Give the grate a good five minutes over those hot coals; this super-heats it, turning any stuck-on food bits into easily removable char. |
| Next, grab your trusty grill brush. With the grate still nice and hot, give it a thorough scrub. You’ll be amazed at how easily those charred residues come right off. A good, stiff-bristled brush with a long handle makes this whole process quick and painless, saving you a lot of effort later. Bear in mind, a clean grate isn’t just about appearances, it’s about preventing unwanted flavors from previous cooks transferring to your fresh food. Plus, a sparkling clean grate signals to your guests that you take your grilling seriously, and that’s a good look! Always make sure your grill is hot when you clean the grate, it’s the most effective method. | |
| Oiling the Grate: what’s the secret? | After you’ve got that grate looking spotless, you might wonder if oiling it is really necessary. Oiling the grate is all about creating a non-stick surface, which is pretty handy for delicate foods or anything that tends to cling. You just need a tiny bit of oil, like a wadded paper towel dipped in some vegetable oil, then carefully wipe it evenly across the hot grate using tongs. |
Here’s the thing, though: use oil sparingly! Too much oil is a recipe for a fiery flare-up, which can be dangerous and definitely not what you want when you’re trying to prep for a delicious meal. A thin, almost invisible layer is all you need to get the job done and keep your food from sticking. Personally, I don’t always oil the grate. If I’m cooking something that’s already marinated in oil, or naturally fatty, I often skip this step entirely. It’s a bit redundant then, and why add extra oil if you don’t have to? But if you’re ever in doubt, a quick, light oiling is always the safer bet to ensure yourBottom LineEssential Charcoal Grill Maintenance Tips for Longevity is covered here with practical details and a clear bottom line. Here's your updated HTML content with relevant internal links added: “`html Essential Charcoal Grill Maintenance helps shape the topic of this article. Quick Answer: essential charcoal grill maintenance tips is worth considering when the page clearly explains who it is for, what to watch out for, and how… Frequently Asked QuestionsWhat is the main point of Essential Charcoal Grill Maintenance Tips for Longevity?Essential Charcoal Grill Maintenance Tips for Longevity is covered here with practical details and a clear bottom line. Here's your updated HTML content with relevant internal links added: “`html Essential Charcoal Grill Maintenance helps shape the topic of this article. Quick Answer: essential charcoal grill maintenance tips is worth considering when the page clearly explains who it is for, what to watch out for, and how… Who is this guide for?This guide is for readers who want a clear, practical explanation of Essential Charcoal Grill Maintenance Tips for Longevity before making a decision or comparing options. What should readers check before deciding?Review the article’s key points, limitations, verdict, related guides, and cited authority source so the decision fits your own needs. frank About the Author: Frank W. Roberts is the voice behind Everything Grill Reviews and has been grilling since 1970. With more than five decades of hands-on barbecue experience, he has tested a wide range of pellet grills, gas grills, smokers, and outdoor cooking equipment in real cooking conditions. He has also entered competitive cookoff events where grill performance, temperature control, and durability matter. His reviews are built on personal experience, real-world testing, and honest analysis to help readers choose the best grill for their needs. Related Reviews🔥
Grill How-To
How Long Does Charcoal Last in a Grill? Real Burn TimesQuick Answer: how long does charcoal last in a grill is covered here with practical details and a clear bottom line. Charcoal has a way of making backyard… 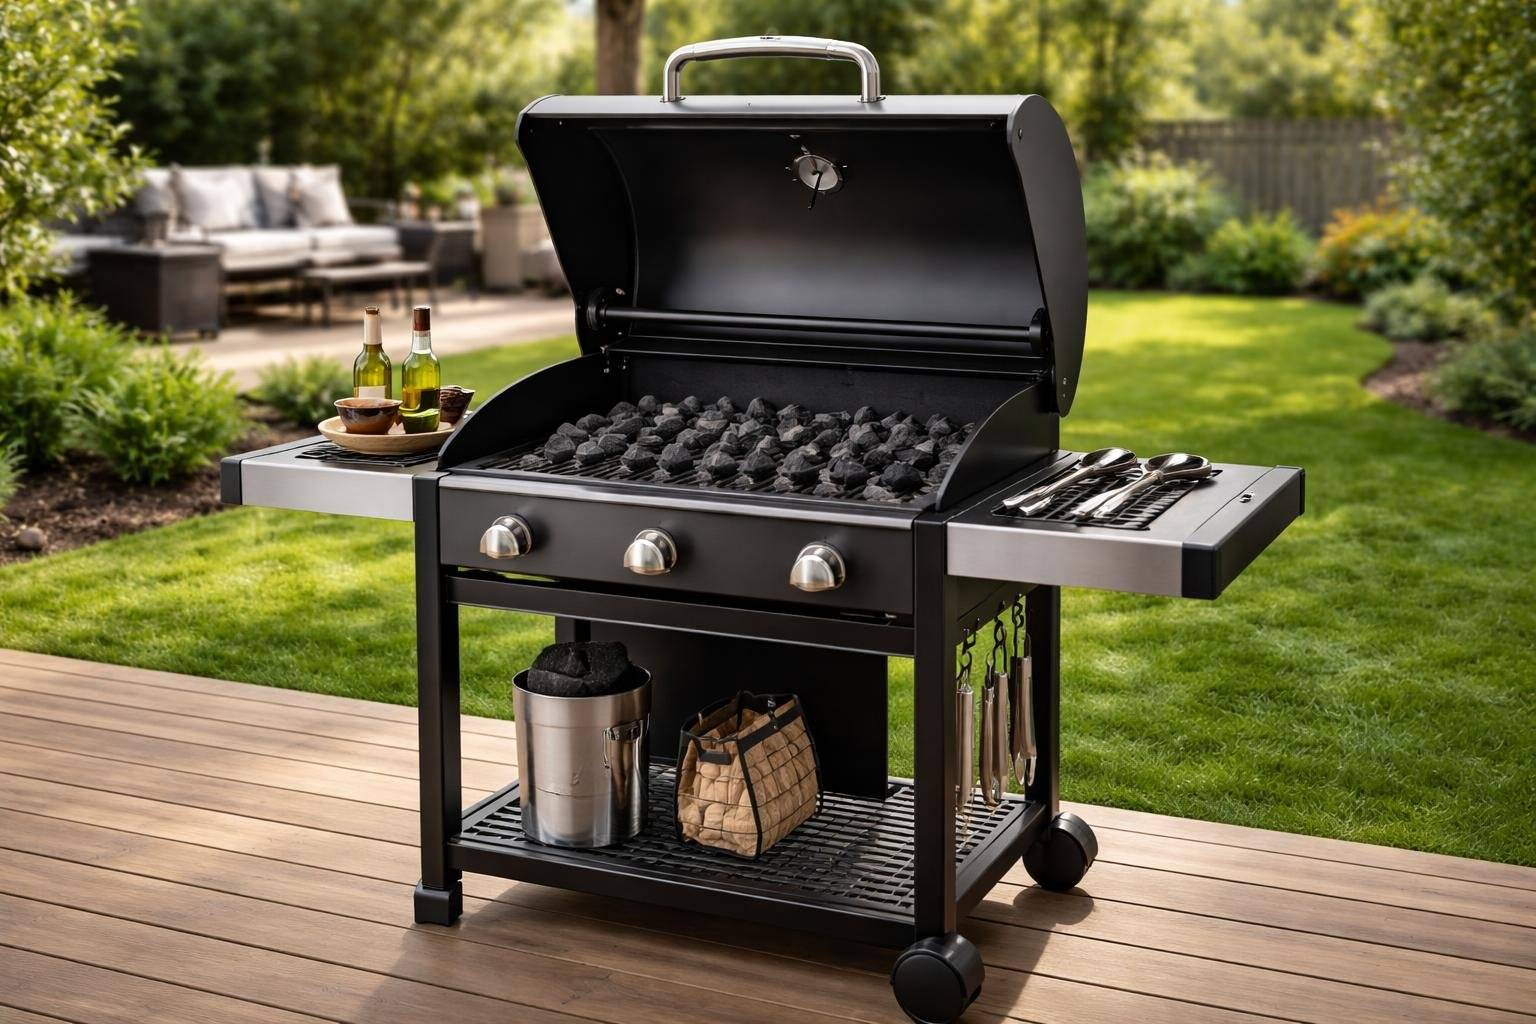
Grill How-To
How to Deep Clean Gas Grill: A Complete GuideUpdated: July 12, 2026 How to Deep Clean Gas Grill: A Complete Guide Are you wondering how to deep clean your gas grill to keep it in tip-top… 
Grill How-To
Complete Guide to Cleaning Your Pellet Grill for Best PerformanceUpdated: July 12, 2026 You rely on your pellet grill for steady heat and clean smoke, but grease and ash build up fast. If you ignore that buildup,… |