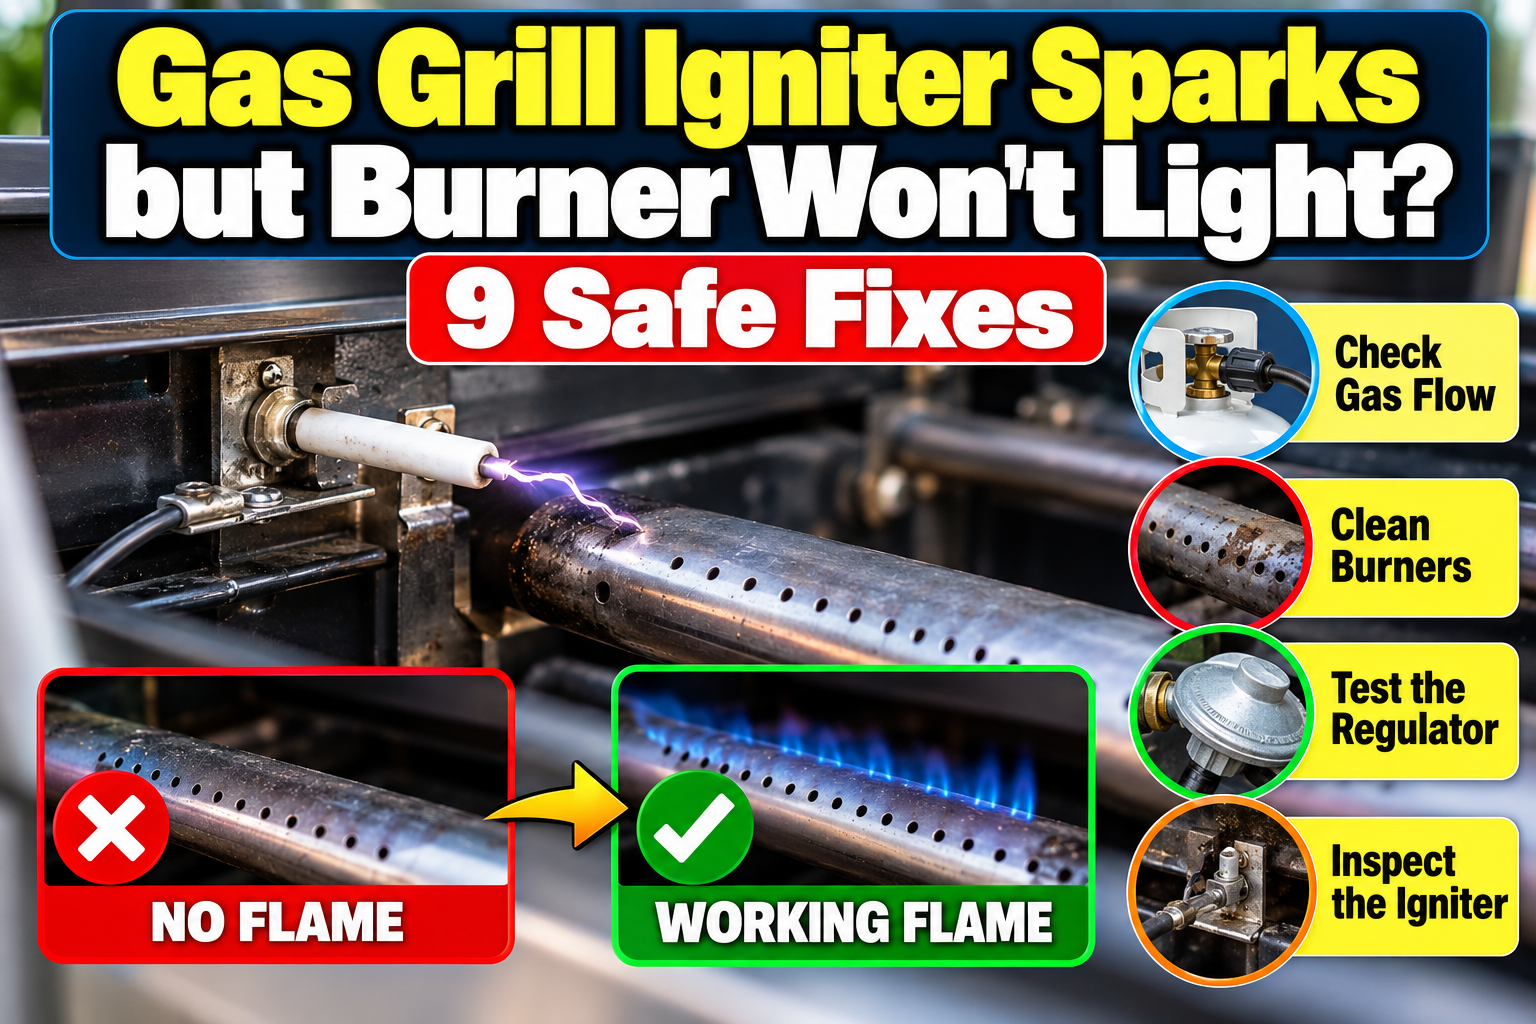
If your gas grill igniter sparks but the burner won’t light, check where the spark lands and whether fuel is reaching that burner. A click by itself proves very little. Start with the simple checks below, then use your grill’s approved manual-lighting procedure to separate an ignition fault from a gas-flow problem before buying replacement parts.
Updated: October 19, 2026
Quick Answer: If a gas grill igniter sparks but the burner won’t light, check spark location, nearby burner ports, and fuel supply. Turn controls and fuel off, keep the lid open, and wait at least five minutes or your manual’s longer clearing time. An approved manual-lighting test separates ignition trouble from gas-flow trouble. Stop if you smell gas or find a leak.
Safety note: This guide covers basic owner checks, cleaning, and diagnosis. It does not tell you to dismantle a gas valve, manifold, regulator, or factory gas fitting. Stop immediately if you smell strong gas, hear gas escaping, see a damaged hose, find a leak, or see flame outside the burner area. Shut off the fuel only if you can do so safely, move people away, and contact the manufacturer, propane supplier, fire department, or a qualified gas-appliance technician as the situation requires.
Key Points at a Glance
- A spark is only part of the diagnosis: it must reach the correct lighting area while gas is present.
- Burner lights manually and burns normally: inspect the electrode, lighting ports, battery when fitted, wiring, and spark position.
- Burner will not light manually: stop repeated attempts and investigate fuel supply or burner condition through the manufacturer’s procedure.
- Leaks, delayed ignition, or flames at the controls: stop using the grill and arrange qualified help.
Table of Contents
Does a Visible Spark Mean the Igniter Is Good?
No. A visible spark means the system is producing a spark, but it does not prove that the spark is strong enough or reaching the right place. The spark has to jump at the correct electrode tip, beside the intended burner ports, while the proper gas-and-air mixture is present.
A spark can appear while the burner remains dark for several reasons:
- The spark is jumping to the cookbox or another metal part instead of the burner.
- The electrode is dirty, wet, cracked, loose, or misaligned.
- A weak battery produces an inconsistent spark under real lighting conditions.
- The burner ports nearest the electrode are blocked.
- The burner is not seated correctly over the valve orifice.
- Gas is not reaching the burner because of an empty cylinder, closed valve, regulator issue, blocked venturi, or valve problem.
The most useful question is whether this burner will light with the model-specific manual-lighting procedure. Weber’s burner-ignition troubleshooting guidance uses that diagnostic split: successful manual lighting points toward ignition trouble; unsuccessful manual lighting calls for a gas-flow check.
Safety First: What Should You Do Before Troubleshooting?
Turn all burner knobs off, close the fuel supply, keep the lid open, and give unburned gas time to disperse before touching anything. Work outdoors in open air. Do not troubleshoot in a garage, carport, enclosed porch, shed, or another confined area.
The U.S. Consumer Product Safety Commission recommends inspecting hoses for cracks, brittleness, holes, sharp bends, and leaks. It also recommends using a soapy solution at propane connections. If bubbles appear, close the fuel supply before making any correction permitted by your manual. If a leak persists, stop using the grill and arrange qualified repair. Never use a flame to search for a leak.
Do not keep clicking while gas accumulates. Manufacturer instructions commonly require shutting the burner off and waiting five minutes after a failed lighting attempt. Follow the exact time and procedure in your own manual.
Stop troubleshooting and get qualified help if you find any of these warning signs:
- A strong or persistent gas odor
- Bubbles that continue during an approved leak test
- A cracked, brittle, burned, or leaking hose
- Flame at the control panel, valve, manifold, hose, or burner inlet
- A split, rusted-through, or badly warped burner
- Repeated delayed ignition with a sudden “whoosh”
- Heavy yellow flame and black soot after the burner finally lights
Why Does the Igniter Spark but the Gas Grill Still Won’t Light?
The failure is usually in one of three places: the ignition path, the burner’s first lighting ports, or the gas supply. Starting with those three groups keeps the diagnosis orderly.
Is the Spark Reaching the Gas Stream?
An electrode can click and spark while sending electricity to the wrong piece of metal. A loose wire, cracked ceramic insulator, bent bracket, or incorrect gap may let the spark ground against the cookbox. Look for the spark only in the manner described by the manufacturer, with the gas supply safely off during the first visual inspection.
Can Blocked Burner Ports Prevent Ignition?
Yes. Blocked ports beside the electrode can prevent the first flame from forming even when the rest of the burner looks clear. Gas nearest the electrode or pilot area must ignite before flame spreads across the burner. Grease, food debris, and corrosion can obstruct those openings.
Can a Wet or Dirty Electrode Stop the Burner Lighting?
Yes. Moisture or deposits around an electrode can interfere with ignition. Napoleon’s ignition troubleshooting guide explains that some ceramic electrode bases retain moisture and that the electrode and pilot area need cleaning. Use your own model’s cleaning and drying method; a procedure for Napoleon’s JETFIRE system should not be applied to every grill.
Can a Weak Battery Still Make an Igniter Click?
Yes. A weak battery may still produce an occasional click or spark without giving reliable ignition. Check the battery only if your system uses one; some electronic igniters use AA or AAA batteries, while piezo systems do not. Moisture or corrosion at the battery contacts can also interrupt current.
Can Incorrect Burner Seating Prevent Lighting?
Yes. A burner that is not seated correctly can have an unsafe gas connection or the wrong relationship to the electrode. After cleaning, return it to the exact position shown in the manufacturer’s diagram. Do not force a burner into place or bend gas components to make them line up.
Why Might Gas Not Reach the Burner?
An empty cylinder, closed supply valve, incomplete connection, restricted regulator, or blockage can prevent normal gas flow. A local burner or valve problem may affect one burner; a main supply problem can affect all of them. Do not diagnose gas flow by holding a valve open and sniffing for fuel.
Could a Blocked Crossover Keep Other Burners Dark?
Yes, on grills that carry flame from one burner to the next through a crossover channel. If the first burner lights but the next one does not, inspect the crossover ports or tube according to the manual. Other designs ignite burners individually, so check your model’s arrangement first.
How Do You Fix a Gas Grill That Sparks but Won’t Light?
Start with the lighting procedure and simple external checks, then use manual lighting as a diagnostic divider. Do not begin by ordering an igniter kit.
Step 1: Reset the Situation Safely
- Turn every burner control to OFF.
- Close the propane cylinder valve or approved natural-gas shutoff.
- Keep the grill lid open.
- Wait the full clearing time stated in the owner’s manual; five minutes is common.
- Do not continue if a strong gas smell remains.
This pause matters because repeated failed ignition attempts can leave a flammable gas cloud in or around the cookbox.
Step 2: Confirm the Correct Lighting Sequence
Open the lid before lighting. Make sure every control knob begins in the off position. Confirm that the cylinder or natural-gas supply is connected correctly. Open the fuel valve in the manner specified by the manufacturer, then light the designated first burner using your model’s instructions.
Many grills require the first burner to ignite before the remaining burners can cross-light. Some use a separate igniter button; others spark when the control knob is turned. Infrared and side burners can have their own sequence. A copied procedure from another grill can produce a false failure.
Step 3: Check the Fuel Supply and Connections
Confirm that the propane cylinder contains fuel and is properly connected. For natural gas, confirm that the approved shutoff is open and that the grill is factory-configured for natural gas. Never connect a propane grill to natural gas, swap orifices, or install an unapproved regulator.
Inspect the hose and connection before lighting. Perform only the leak test described by the grill manufacturer. If a connection continues to bubble after the permitted correction, close the fuel supply and arrange service.
If every burner has a tiny flame or none of them receives normal gas after the tank was opened quickly, the propane regulator may have entered a restricted-flow mode. The correct reset sequence depends on the grill. Use the owner’s manual or manufacturer support. If repair is no longer economical, Frank’s Gas Grill Reviews hub can help you compare replacement options.
Step 4: Inspect the Igniter Battery
If the ignition module uses a battery, install a fresh battery of the exact type and orientation shown in the manual. Check the cap, spring, and contact surfaces for moisture or corrosion. Clean them only as the manufacturer permits and let the compartment dry before reinstalling the battery.
If the grill uses a piezo igniter, there is no battery to replace. Do not force open a sealed piezo unit looking for one.
Step 5: Find Where the Spark Is Actually Jumping
With the gas supply closed and the grill cool, remove only the grates or heat shields the manual permits for inspection. Operate the igniter while watching from a safe angle. Never put your face over the cookbox.
Look for these clues:
- A strong spark at the electrode tip beside the first burner ports
- A spark jumping to the cookbox, bracket, or heat shield
- A faint or inconsistent spark
- No spark at the intended electrode even though another electrode fires
- A cracked ceramic insulator or burned wire
- A loose push-on wire at the ignition module or electrode
Reconnect only simple external terminals the manual identifies. Do not splice ignition wires near the cookbox or substitute household wire.
Step 6: Clean the Electrode and Nearby Burner Ports
Shut off and isolate the fuel first. Clean the electrode and burner only with the tools and direction stated in the owner’s manual. A soft brush may be appropriate for some parts; another manufacturer may specify a different method.
Pay special attention to the ports closest to the electrode and any small carryover openings. Brush across burner ports when directed so debris is not pushed inside. Never drill, enlarge, or reshape a burner hole. Never poke a hard object into the gas orifice behind the burner.
If the burner has a split seam, rust hole, severe scaling, or damage around the lighting ports, replace it with the approved part. Cleaning cannot restore damaged metal.
Step 7: Check Burner Seating, Electrode Position, and Gap
Compare the burner and electrode with the parts diagram. The burner must sit securely over the valve orifice, and the electrode must be positioned where the manufacturer intended. Tighten only the fasteners identified in the manual.
Do not bend an electrode or change the spark gap using a generic measurement from the internet. The correct gap and direction vary among grill families. A small change can make the spark jump to the wrong surface or crack the ceramic.
Step 8: Use the Manual-Lighting Test
Use a manual-lighting test only when your model’s owner’s manual provides the procedure and there are no leak or damage warning signs. Weber’s manual-lighting instructions describe one example using an open lid and the supplied match holder. In that procedure, a failed attempt means turning the burner off within five seconds and waiting five minutes before another attempt. Some models specify a shorter attempt, so follow your exact manual.
Use your own owner’s manual because the lighting hole, first burner, control position, and tool differ by model. Do not drop a lit match into the cookbox or hold a handheld lighter over an unknown gas outlet.
- If the burner lights manually: Gas is reaching the burner, so the likely fault is the electrode, battery, wire, ignition module, spark position, or nearby lighting ports.
- If the burner does not light manually: Stop clicking the igniter. Investigate fuel supply, valve operation, burner blockage, venturi obstruction, regulator behavior, or burner seating. A qualified technician may be needed.
Step 9: Reassemble and Perform One Controlled Test
Return every burner, heat shield, grate, clip, and fastener to the position shown in the manual. Perform any required leak check. Then make one normal lighting attempt outdoors with the lid open and everyone clear of the cookbox.
The burner should light promptly and carry flame across its ports without a delayed burst. The exact normal flame color varies, but many gas grills show mostly blue flame with small yellow tips. Shut down if flame appears at the burner inlet or control panel, lifts far away from the ports, produces heavy soot, or ignites with a pronounced delayed whoosh.
Gas-Grill Ignition Troubleshooting Chart
| What You Observe | Likely Area to Check | Safe Next Step |
|---|---|---|
| Strong spark; burner lights manually | Electrode position, lighting ports, wire, or ignition module | Clean and inspect the ignition path according to the manual |
| Spark jumps to cookbox | Misaligned electrode, damaged ceramic, or exposed wire | Shut off fuel; inspect and replace the approved part if damaged |
| Weak or intermittent spark | Battery, corroded contacts, wet electrode, loose connection | Install the correct fresh battery; dry and inspect permitted connections |
| One burner will not light manually | Blocked ports or venturi, mis-seated burner, valve fault | Cool and isolate fuel; clean and reseat per manual or arrange service |
| No burners light manually | Fuel supply, regulator, tank connection, main shutoff | Stop ignition attempts and follow model-specific gas-flow troubleshooting |
| First burner lights; others do not | Crossover ports/tube or individual burner blockage | Clean the carryover system as the manual directs |
| Delayed boom or whoosh | Gas accumulation before ignition | Stop using the grill and arrange qualified inspection |
| Gas odor or leak-test bubbles | Connection, hose, regulator, valve, or fitting leak | Close fuel if safe; do not light; obtain qualified repair |
What If Only One Burner Won’t Light?
A one-burner problem usually points to that burner’s electrode, ports, crossover path, seating, or control valve—not the cylinder as a whole. Compare the failed burner with a working one only visually. Do not move gas valves, orifices, electrodes, or regulators between positions unless the manufacturer’s service instructions explicitly allow it.
If the failed burner lights manually and burns normally after lighting, focus on its ignition path. If it cannot be lit manually but the other burners work, suspect a local blockage, damaged burner, or valve problem. If flame cannot travel from the first burner to the next, inspect the crossover openings.
Burner blockage can also create uneven heat after the grill lights. Frank’s guide on fixing hot and cold spots on a gas grill explains how burner ports and heat shields affect the cooking surface.
Common Gas-Grill Igniter Mistakes to Avoid
Do Not Keep Clicking While Gas Builds Up
A burner that has not ignited is not harmless. Turn the knob off and wait the full clearing time. Repeatedly adding fuel can create delayed ignition and a sudden fireball when a spark finally catches.
Do Not Lean Over the Grill
Stand back from the cookbox and keep the lid open during ignition. Face and hand burns can happen before you have time to react.
Do Not Use a Flame to Find a Leak
Use only the manufacturer-approved leak-test solution and procedure. A match or lighter is not a leak detector.
Do Not Drill Burner Ports or Gas Orifices
Enlarging a port changes the gas-flow pattern. Damaging an orifice can create unsafe combustion. Clean only as directed and replace damaged parts with approved components.
Do Not Bypass Safety Devices
Never defeat a regulator, valve, lid switch, flame safeguard, or factory interlock. If a safety device appears to be stopping operation, the answer is diagnosis—not bypassing it.
Do Not Wash Ignition Parts With a Hose
Water can enter the ignition module, battery compartment, electrode ceramic, and wiring connections. Use the cleaning method specified for those components and protect the control area when cleaning the cookbox.
Do Not Ignore Grease During an Ignition Repair
A newly restored burner can ignite old grease in the cookbox. Clean the grease tray, catch pan, and heavy buildup before the final test. The site’s guide to preventing grill flare-ups covers safe grease control in more detail.
How Can You Prevent Ignition Problems?
Keep the burner’s lighting area clean and dry, inspect the ignition system during routine maintenance, and follow the same startup sequence every time.
- Clean burner ports and the crossover system at the intervals in the manual.
- Remove grease buildup before it covers the electrode or first burner ports.
- Protect the grill from rain after it is fully cool, but allow trapped moisture to escape.
- Replace the igniter battery on a sensible schedule if the system uses one.
- Inspect electrode wires and ceramic insulators for heat damage and cracking.
- Check burner seating after any deep cleaning or part replacement.
- Keep spiders and insects from nesting by inspecting stored grills before seasonal use.
- Retain the owner’s manual, model number, serial number, and parts diagram.
Do not coat the electrode, burner ports, or valve area with cooking oil or cleaner. These parts must remain free of residue.
When Should You Replace the Igniter or Call for Service?
Replace an ignition part only after the manual-lighting test and inspection point to that part. A new igniter will not fix an empty cylinder, blocked burner, stuck valve, regulator problem, or mis-seated burner.
An approved igniter kit may be reasonable when the burner lights manually, the nearby ports are clear, the burner is correctly seated, and the electrode, module, wire, or battery holder has a confirmed fault. Use the grill’s exact model and serial number because ignition kits can look similar while having different brackets, wires, electrode gaps, and connector arrangements.
Call the manufacturer or a qualified technician when:
- The grill is under warranty.
- The fault involves a valve, manifold, regulator, fixed gas line, or factory fitting.
- Manual lighting fails after basic supply and burner checks.
- Ignition is delayed or produces a whoosh.
- A leak remains after the permitted connection check.
- The burner, hose, firebox, or mounting points are badly corroded.
- You are unsure which component is safe to remove.
Sometimes replacing one model-specific electrode is sensible. On an older grill with a rusted firebox, damaged hose, failing burners, and valve trouble, professional repair may cost more than the grill is worth. The safe condition of the entire fuel system matters more than keeping one appliance alive.
Frequently Asked Questions
Why Does My Grill Igniter Click but Not Light the Burner?
The spark may be weak, misplaced, or separated from the gas stream. The nearby burner ports may be blocked, the burner may be mis-seated, or gas may not be reaching it. A model-specific manual-lighting test helps separate ignition faults from gas-flow faults.
Can an Igniter Spark and Still Be Bad?
Yes. It can spark intermittently, ground to the wrong metal surface, or fire too far from the first burner ports. Cracked ceramic, damaged wire, weak battery power, moisture, and misalignment can all produce a visible but ineffective spark.
Why Does My Gas Grill Light With a Match but Not the Igniter?
If the grill lights promptly with the exact manual procedure and burns normally, the gas path is probably working. Inspect the battery, electrode, wire, module, spark location, and burner ports closest to the electrode.
Why Won’t the Burner Light Even With a Long Lighter?
Gas may not be reaching the burner, or the burner may be blocked or incorrectly seated. Stop repeated attempts, turn everything off, let gas clear, and check the fuel supply and model-specific gas-flow procedure. Valve, regulator, or manifold faults require qualified service.
How Long Should I Wait After a Failed Lighting Attempt?
Follow the owner’s manual. Five minutes is a common manufacturer instruction after turning the failed burner off, but the exact procedure for your grill controls.
Should I See the Spark on a Gas Grill Igniter?
You may be able to see it at the electrode, especially in shade, but never put your face over the grill. Make the first visual check only with the gas supply off and the grill cool, following the manufacturer’s access instructions.
Can a Weak Battery Still Make the Igniter Click?
Yes. A battery-powered module may click or spark inconsistently without producing reliable ignition. Install a fresh battery of the correct type and orientation, and inspect the battery contacts for moisture or corrosion.
Can Rain Stop a Gas Grill Igniter From Working?
Moisture can weaken or redirect a spark, especially around the electrode ceramic and wiring connections. Let the components dry using the manufacturer’s instructions. Do not apply a torch, heat gun, or open flame to dry an ignition system.
Can Spiders Keep a Gas Grill Burner From Lighting?
Yes. Spiders and insects can obstruct the burner venturi or pilot area, disturbing gas flow. Clean only through the access and method described in the manual. Never push an object into a gas orifice.
Is It Safe to Keep Manually Lighting a Gas Grill?
Manual lighting can be an approved temporary method when the manufacturer provides a specific procedure and the burner lights promptly and normally. It is not safe when there is a gas odor, leak, delayed ignition, damaged fuel component, abnormal flame, or no model-specific lighting procedure.
Conclusion: Diagnose the Spark and Fuel Before Buying Parts
A spark is only one part of gas-grill ignition. Begin with the correct startup sequence, inspect the fuel supply, install a fresh battery when applicable, and clean the electrode and first burner ports according to the manual. Then use the approved manual-lighting procedure as the dividing test.
If the burner lights manually, work back through the electrode, wiring, module, and spark position. If it does not, stop blaming the igniter and investigate gas flow, burner blockage, seating, and fuel components. Strong gas odor, leaking connections, delayed ignition, damaged burners, and fuel-system repairs belong with qualified service—not repeated clicking.