Updated: October 1, 2026
Updated and fact-checked: September 30, 2026
A 30-day charcoal grill how-to is a fire-skill calendar, not 30 different rubs. Each day teaches one job: light a clean chimney, bank a two-zone fire, then hold heat with the vents. The food is only the test. Judge doneness with a thermometer, not the color of the crust.
Quick Answer: How Do You Run a 30-Day Charcoal Grill How-To?
Practice one charcoal skill a day: chimney lighting, a two-zone bank, then vent control. Whole beef, pork, lamb, and veal need 145°F plus a 3-minute rest, ground meat 160°F, poultry 165°F, and fish 145°F, per the USDA FSIS chart. Clock times are estimates.
Key Points
- A 30-day charcoal plan works when the fire is the lesson and the meal is the quiz.
- Light charcoal in a chimney with a solid starter or newspaper. Do not pour lighter fluid on an existing fire, and never use gasoline.
- Bank lit coals on one side for two-zone heat. Sear over the coals. Finish on the empty side with the lid closed.
- The bottom vent is the main heat control. Leave the top vent mostly open so the fire can breathe.
- USDA safety minimums and barbecue tenderness are different numbers. A pork shoulder can be safe at 145°F and still be tough.
- Never burn charcoal in a house, garage, tent, or vehicle. Carbon monoxide has no smell. Ash goes out only after it is fully cold.
What Safety Rules Come Before the First Fire?
Cook outdoors, keep the lid open while you light, and do not move a grill that still holds hot coals. The U.S. Consumer Product Safety Commission warns that burning charcoal gives off carbon monoxide and should never be used inside homes, vehicles, or tents, even with ventilation. CPSC also says not to store a grill indoors with freshly used coals, and to keep a lit grill away from buildings, garages, carports, and anything overhead that can catch fire.
Keep a metal ash can with a lid for cold ash only. Do not dump warm ash into a paper bag, plastic bin, or the woods. Charcoal can look dead and still be hot enough to start a fire. If the grill is on a deck, confirm the deck and the grill manual allow it, and keep a clear space around the cooker.
Food safety is separate from fire safety. Use an instant-read thermometer in the thickest part, away from bone. Whole beef, pork, lamb, and veal steaks, chops, and roasts need 145°F and a 3-minute rest. Ground meat needs 160°F. Poultry needs 165°F. Fish needs 145°F. Those minimums are on the USDA FSIS safe temperature chart. Refrigerate leftovers within 2 hours, or within 1 hour if the air is above 90°F, and reheat them to 165°F.
What Do You Need Before Day 1?
You need a charcoal grill with working vents, a chimney starter, dry fuel, long tools, and a thermometer. A 22-inch kettle is the easiest cooker for this plan because the fire layout is visible. A cart-style charcoal grill works if you can bank coals to one side. A kamado can follow the same skills, but the vent positions and fuel load will not match a kettle.
- Briquettes for steady fires and lump for hot, fast fires. Store both dry. Damp charcoal lights poorly.
- A chimney starter and a manufacturer-approved solid fire starter, or a small amount of loosely crumpled newspaper. Lighting detail is in how to light a charcoal grill without lighter fluid.
- Long tongs, a grill glove, and a grate thermometer or a leave-in probe at food level. The lid thermometer reads the dome, not the grate.
- A drip pan for indirect cooks. Wood chunks only after the coal fire is clean. Do not soak them.
A full chimney is the usual high-heat load on a standard kettle. A half chimney is a common medium load. Wind, charcoal brand, and grill size move those amounts. Treat them as starting points, not a promise.
How Is the 30-Day Charcoal How-To Built?
Week 1 is lighting and two-zone heat. Week 2 is sear, flare-ups, and smoke. Week 3 is a low fire. Week 4 is shutdown and a cook you run without the sheet. Weeknights stay under about 90 minutes of fire time after the coals are ashed. The long fire sits on a weekend day. Skip a day rather than rushing a snake at 9 p.m.
Preheat is not included in the practice time. Coals need to ash over before food goes on, often 15 to 20 minutes in a chimney. If the top coals are still black, wait.
What Is the 30-Day Charcoal Grill How-To Plan?
Follow the skill, the fire layout, and the internal-temperature target. “Pass when” is the skill check. The food still has to hit the USDA number before anyone eats it.
| Day | Skill | Practice cook | Fire | Pass when |
|---|---|---|---|---|
| 1 | Chimney light, no food | None | Full chimney, vents open | Top coals gray; starter gone |
| 2 | Two-zone bank | Beef burgers | Coals on half the grate | 160°F in the center; cool side used once |
| 3 | Lid closed vs open | Sausages and onions | Two-zone, medium | Fresh sausage 160°F; you can feel the lid change |
| 4 | Bottom-vent control | Thick pork chops | About 350–400°F grate | 145°F plus a 3-minute rest; one vent tweak only |
| 5 | Direct hot sear | Steaks | Full chimney, open vents | 145°F plus rest, or pull earlier only by preference after you know the number |
| 6 | Weekend low fire | Ribs or chicken thighs | 225–275°F indirect | Fire holds an hour without a reload; poultry 165°F |
| 7 | Cold shutdown | Leftovers, or none | Vents closed after the cook | Ash handled only when cold; leftovers 165°F if reheated |
| 8 | Half chimney vs full | Chicken thighs | Half chimney, two-zone | 165°F in the thickest thigh; skin rendered, not scorched |
| 9 | Flare-up move | Fatty sausages | Two-zone | Food moved to the cool side; 160°F in fresh sausage |
| 10 | One dry wood chunk | Pork chops | Chunk on ashed coals | Smoke thins before food goes on; 145°F plus rest |
| 11 | Reverse sear | Thick steak | Cool side, then hot side | Indirect first; sear last; 145°F plus rest for the USDA minimum |
| 12 | Do not crowd the grate | Beef or chicken kebabs | Direct, medium-high | Beef cubes 145°F plus rest; chicken 165°F |
| 13 | Indirect roast | Whole chicken | About 350°F indirect | 165°F in the breast and the innermost thigh |
| 14 | Rest, then slice | Leftover chicken | Off the fire, tented | Rest finished before cutting; reheat to 165°F if it was chilled |
| 15 | Briquettes vs lump | Same chops or thighs | Matched coal volume | You note which fuel held steadier. This is observation, not a lab test |
| 16 | Add fuel mid-cook | Pork loin roast | Two-zone, add lit coals | 145°F plus rest; temperature did not crash after the add |
| 17 | Drip pan indirect | Chicken pieces | Pan on the empty side | 165°F; grease stayed in the pan |
| 18 | Vegetables after meat | Peppers and onion | Cooler side of a used fire | Tender with color, not black ash |
| 19 | Wind adjustment | Burgers again | Lid seam turned out of the wind | 160°F; you changed vents instead of lifting the lid every minute |
| 20 | Weekend snake or Minion | Ribs | 225–275°F, briquettes | Bend test and probe-tender; well past 145°F |
| 21 | Leftover reheat | Ribs in a covered pan | Moderate indirect, or stovetop | 165°F throughout |
| 22 | Grate clean after cooldown | None, or a short sear | Warm grates, fire out or low | Debris off; finish not scraped bare |
| 23 | Probe placement | Boneless chicken breasts | Indirect, about 350°F | 165°F in the thickest part, not against a bone or the pan |
| 24 | Gentle zone for fish | Salmon fillets | Medium, oiled grates | 145°F or opaque and flaking |
| 25 | Repeat a week-1 cook faster | Burgers | Two-zone, from memory | 160°F without checking the sheet mid-light |
| 26 | Hold a roast | Pork tenderloin | Two-zone, about 375°F | 145°F plus a 3-minute rest |
| 27 | Pan cook on the grill | Stuffed peppers | Indirect, about 350°F | 165°F in the filling |
| 28 | Ash and fuel storage | None | Grill fully cold | Ash out; charcoal sealed and dry |
| 29 | Cover only when cold | None | Vents set as the manual directs for storage | No warm metal under the cover |
| 30 | Free cook | Any weeknight meal | Your call | Safe internal temperature and a fire you shut down cold |
How Do You Light Charcoal on Day 1?
Fill a chimney, light it from below, and wait until the top coals turn gray. Open the bottom vent and clear old ash so air can reach the fire. Set the chimney on the charcoal grate, not on the ground, unless the chimney maker says otherwise. Use a solid starter or loose newspaper under it. When the top is ashed and the bottom glows, put on a glove and pour the coals where the layout needs them.
Do not cook over a starter that is still burning. Do not squirt lighter fluid onto lit coals. Never light charcoal with gasoline, diesel, kerosene, alcohol, or aerosol cooking spray. If you have no chimney, the mound method is in the lighting guide linked above. Day 1 can end with an empty grate. Learning the pour without food on the line is the point.
How Do You Set Up Two-Zone Heat?
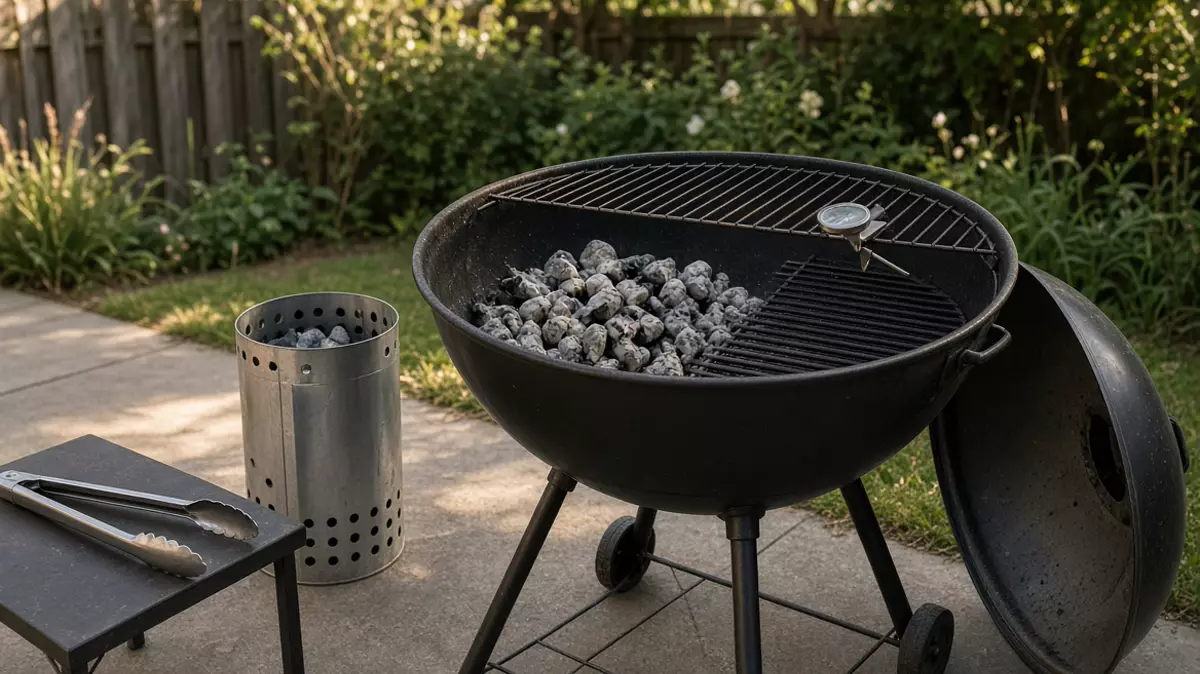
Dump ashed coals on half the charcoal grate and leave the other half empty. Food sears over the coals and finishes on the empty side with the lid closed. Baskets only keep the pile from spreading. The full layout is in how to set up two-zone grilling on charcoal or gas.
- Clean ash so the bottom vent works.
- Light the chimney and wait for gray tops.
- Pour onto one half. Leave a clear cool zone.
- Put the cooking grate on, lid closed, until the grate probe settles.
- Oil the grates after they are hot, not while they are cold and rusty-wet.
Briquettes hold a steadier bed for a long two-zone roast. Lump lights faster and can run hotter, which helps a sear and hurts a long hold if the pieces are uneven. Day 15 is only there so you see that difference on your grill.
How Do You Hold the Temperature With Vents?
Start with both vents open, then pinch the bottom vent once the grate is near the target. More air means a hotter fire. The top vent is the exhaust. Closing it to a slit dirties the fire and can stall the cook. For a 225°F hold, the site’s kettle method is a snake or Minion, top vent mostly open, bottom vent narrowed after the grate passes about 200°F. That setup is in how to keep a charcoal grill at 225°F.
Make one small vent change and wait. Chasing the lid thermometer by opening the lid dumps the heat you just built. On a windy day, turn the lid so the top vent faces away from the wind if the grill is built that way, and expect to use a little more fuel.
How Do You Handle a Flare-Up or Dirty Smoke?
Move the food to the empty side, close the lid, and do not spray water on the coals. Fat on a hot coal pile will flame. A short flame over a burger is common. A grease fire that keeps growing is a shutdown: lid on, vents closed as the manual allows, and everyone back. Prevention is trimmed fat, a clean bowl, and a cool zone. More on that is in how to prevent grill flare-ups.
Thick white smoke that stings the eyes usually means the starter is still burning, the wood is wet, or the fire is starved of air. Wait for thinner smoke that smells like clean wood before the food goes on. One dry chunk on ashed coals is enough for a chop. A pile of soaked chips makes steam and ash.
How Do You Run the Weekend Low Fire?
Use a briquette snake or Minion, food on the empty side, and a grate probe. Light one end only. A common kettle snake is two briquettes wide and two high, with a gap for the cool zone. A thinner snake runs cooler and shorter. Lump is a poor fuse because the gaps skip or surge.
Ribs are done by bend and by a probe sliding between the bones, not by a clock. They will be well past the 145°F whole-muscle minimum before they are tender. Chicken on that same fire still needs 165°F. A pork shoulder can be a later project once you can hold 225–275°F for several hours. Probe-tender is often around 195–205°F, which is a texture target, not a safety minimum.
Reverse sear belongs on a thick steak, not a thin one. Indirect first, hot side last. The sequence is in how to reverse sear a steak on a grill. Rest whole cuts before you slice. Resting is covered in how to rest meat after grilling.
How Do You Shut Down and Store the Fuel?
Close the vents after the cook, leave the grill outside, and touch nothing in the ash until it is cold. Do not roll a kettle into a garage to finish dying. CPSC’s charcoal warning exists because the coals keep making carbon monoxide until they are out. Cover the grill only after the metal is cold. A cover on a warm cooker traps moisture.
Cold ash can go into a metal can. Charcoal goes back into a dry, lidded container, bag rolled shut inside the bin if that is how you bought it. Storage steps are in how to store wood pellets and charcoal so they stay dry. Off-season shutdown is in how to winterize a grill.
What Mistakes Ruin the 30 Days?
The usual miss is cooking before the coals are ready, then lifting the lid to check. Other misses are a full chimney for a chicken roast, lump in a snake, lighter fluid taste from a rushed start, and calling ribs done because an hour passed.
| What you see | Likely cause | First fix |
|---|---|---|
| Fire will not hold | Ash blocking the bottom vent, damp fuel, or too little charcoal | Cold-clean the bowl next time; add lit coals, not a pile of raw lump |
| Runs away hot | Vents wide, wind, or too much fuel | Pinch the bottom vent; do not seal the top |
| Bitter smoke | Starter still burning, wet wood, or a choked exhaust | Wait, open the top vent, use dry wood |
| Burnt outside, raw middle | All direct heat | Move to the empty side and close the lid |
Frank’s Take
Charcoal rewards the cook who can wait. I have run charcoal and stick fires since 1970, and the cooks that go wrong are almost always lit too early or vented by guess. A chimney and a grate probe remove most of that. This calendar is technique I use, not a test of a particular kettle brand. Your grill’s manual still wins if it conflicts with a general vent note here.
Final Verdict: Can You Learn Charcoal in 30 Days?
Yes, if you repeat two-zone heat until the bank is automatic. Thirty days will not make you a pitmaster. They will make lighting, a cool zone, and a cold shutdown ordinary. That is the part most new charcoal cooks skip. If you want set-and-forget weeknights instead of fire practice, the site’s 30-day pellet grill recipe plan is the other calendar. It is a recipe plan, not this skill plan.
Frequently Asked Questions
Do you have to cook all 30 days in a row?
No. Skip a day and keep the skill order. The weekend low fire is the one to protect. A missed Tuesday burger does not break the plan. A skipped shutdown habit does.
Can you use lighter fluid anyway?
Only if the fluid and the charcoal are labeled for it, and only at the start. Never add fluid to a fire that is already going. A chimney avoids the taste problem and is the method this plan uses.
What if the grill has no thermometer?
Buy a grate probe before you chase low-and-slow. A hand over the grate is a rough sear check, not a 225°F check. Food still needs an instant-read in the meat.
Is a kamado on this plan?
The skills transfer, the fuel load does not. Use the kamado manual for vent starts and coal amount. Keep the same internal-temperature targets.
Related Reading
- How to Light a Charcoal Grill Without Lighter Fluid
- How to Set Up Two-Zone Grilling on Charcoal or Gas
- How to Keep a Charcoal Grill at 225°F
- How to Prevent Grill Flare-Ups
- How to Winterize a Grill
About Frank W. Roberts
Frank W. Roberts is the author of Everything Grill Reviews. He has grilled since 1970 and brings more than 50 years of backyard cooking and cookoff experience to fire management, fuel behavior, smoke, and practical cooker use. This how-to is technique guidance, not a hands-on test of a named charcoal grill. Last verified September 30, 2026.